




How to Use ACCELQ Autopilot Converse: Jira Story to Running Test Suite in 6 Steps

ACCELQ Autopilot Converse is the chat interface where ACCELQ’s AI agents turn a Jira story, plain-English description, Gherkin file, or Swagger spec into Contexts, Actions, Scenarios, and Test Cases. Everything it generates is editable in the Scenario Designer and reusable across your project.
This guide walks through a complete Converse session using a JIRA story (“Create and Verify a Lead in Salesforce”), covering test planning, automation, API testing, test data generation, execution, and results analysis. New to ACCELQ? Build your first test by hand first: How to Get Started with ACCELQ: Build Your First Test in 8 Steps.
- The most damaging Workday failures happen at integration points between Workday and connected systems such as SAP, Salesforce, and custom APIs.
- ACCELQ is the only Workday testing tool that validates Workday and connected systems, including the API layer, in one codeless flow.
- Opkey suits Workday-only teams that need fast coverage, with 4,000+ pre-built scripts and Workday Partner status.
- Worksoft Certify and Tricentis Tosca fit programs that test SAP and Workday together.
- Kainos Smart Test compares each Workday release against the previous version to flag affected configurations and tests.
- Workday ships biannual releases in March and September. Teams without automated regression spend 60 to 80 percent of the preview window on manual testing.
- Payroll is the highest-risk Workday module and needs gross-to-net, pre-parallel, and off-cycle payroll scenario testing.
- SOX, HIPAA, and GDPR audits require traceability from requirement to test case, execution result, and sign-off.
- testRigor, Panaya, and ACCELQ let HR and Finance users own Workday UAT without IT support.
Which Converse Task Do You Need?
| Your situation | Start with | What you get |
|---|---|---|
| A new Jira story, Gherkin file, or feature description | Build Test Plan & Automate | A data-driven test plan, then automated Scenarios |
| An existing manual test suite in ACCELQ | Automate ACCELQ Manual Tests | Automation Scenarios linked both ways to the manual tests |
| A Swagger/OpenAPI spec | Automate API Tests | User journey and endpoint Scenarios with built-in verifications |
| No usable test data | Generate Test Data | A constraint-aware synthetic dataset in CSV, Excel, JSON, or XML |
| You want to run tests by describing them | Run by Intent | A running job, started from a scenario name, suite, or plain-English intent |
| A job is running or finished | Check Job Status | The job's status and pass rate |
| Tests already run, release decision pending | Summarize Runs | A Release Readiness report with a verdict and failure classification |
Before You Start
- An ACCELQ account with Autopilot enabled. Start a 14-day free trial.
- A requirements tool connected under Project Admin → Requirements Traceability. Jira, Azure DevOps, Rally Cloud, Spira, ClickUp, and Agile Accelerator are supported. This guide uses Jira.
- An Application in App Hub for the system under test, ideally with its key screens attached. Converse asks you to pick one in most tasks.
- For Step 3: a Swagger/OpenAPI (version 2 or 3) URL or file.
Step 1: Generate a Test Plan from a Jira Story
1. Click Autopilot in the left navigation. Chat opens on the left and the task menu on the right.
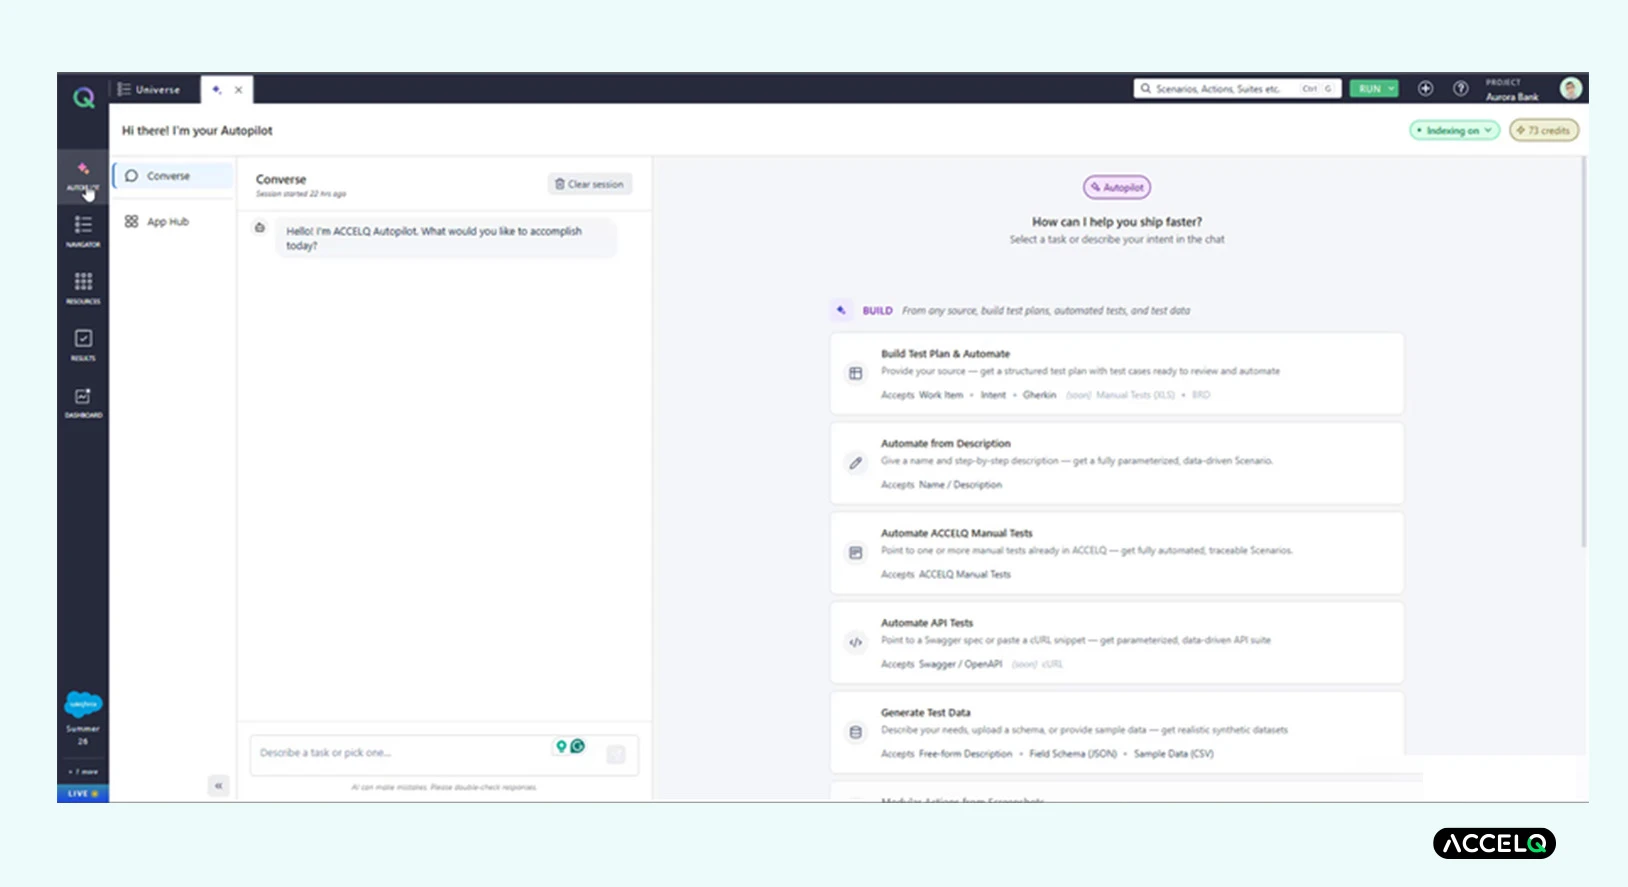
Autopilot Converse interface. Chat panel on the left, BUILD menu on the right.
2. Select Build Test Plan & Automate. The menu expands to the BUILD, DISCOVER, and ANALYZE actions.
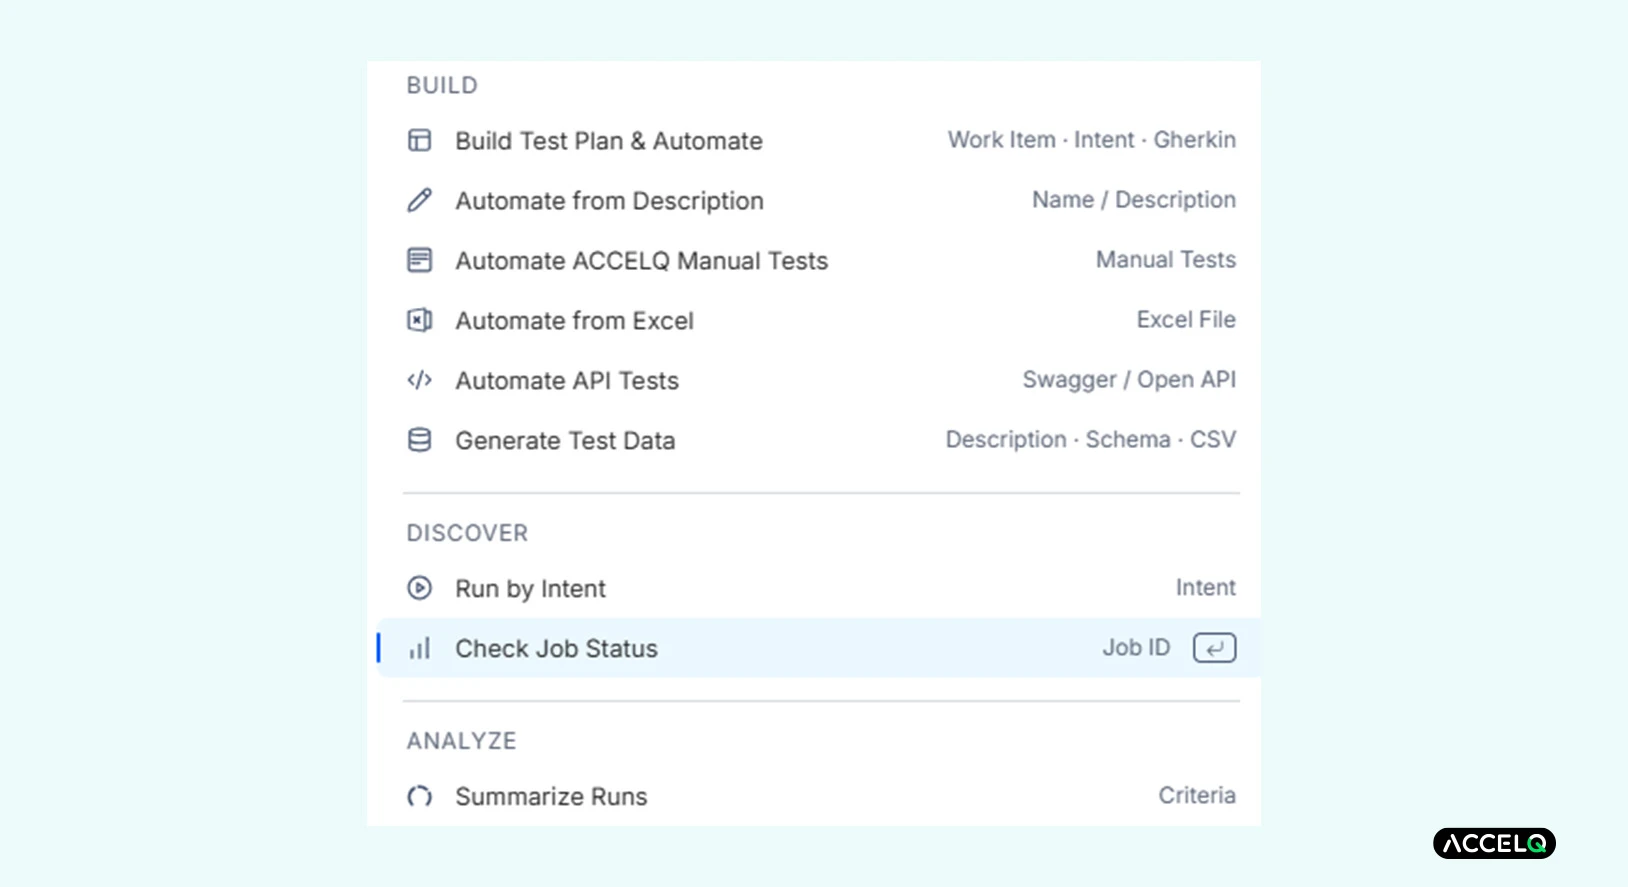
The task menu expanded: BUILD, DISCOVER (Run by Intent, Check Job Status), and ANALYZE (Summarize Runs).
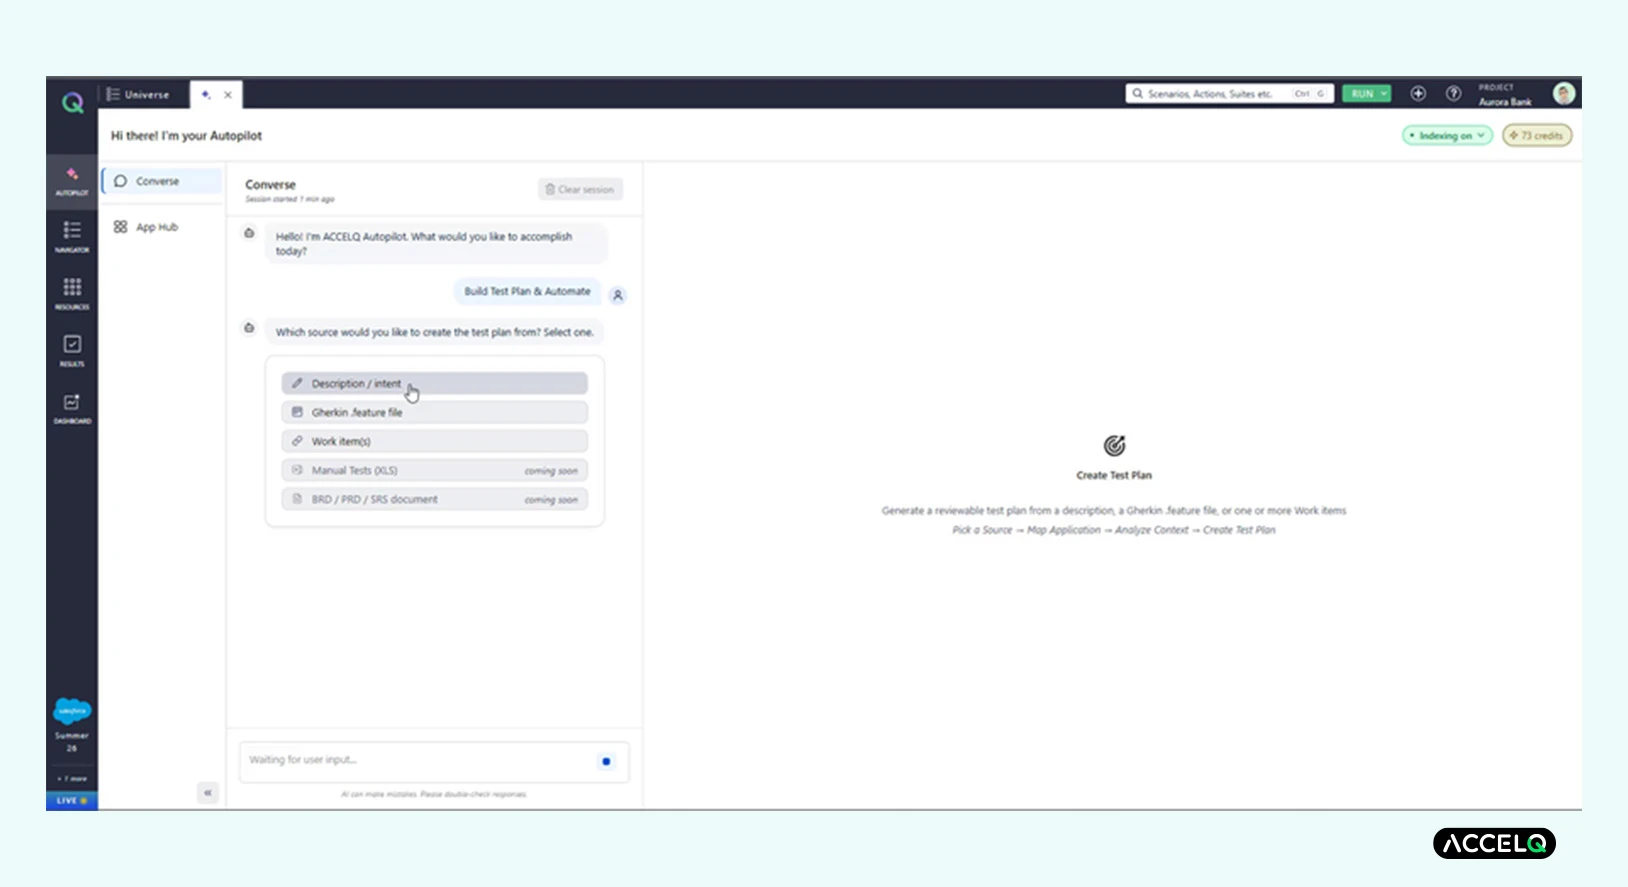
3. Choose a source: Description/intent, Gherkin .feature file, or Work item(s). Select Work item(s).
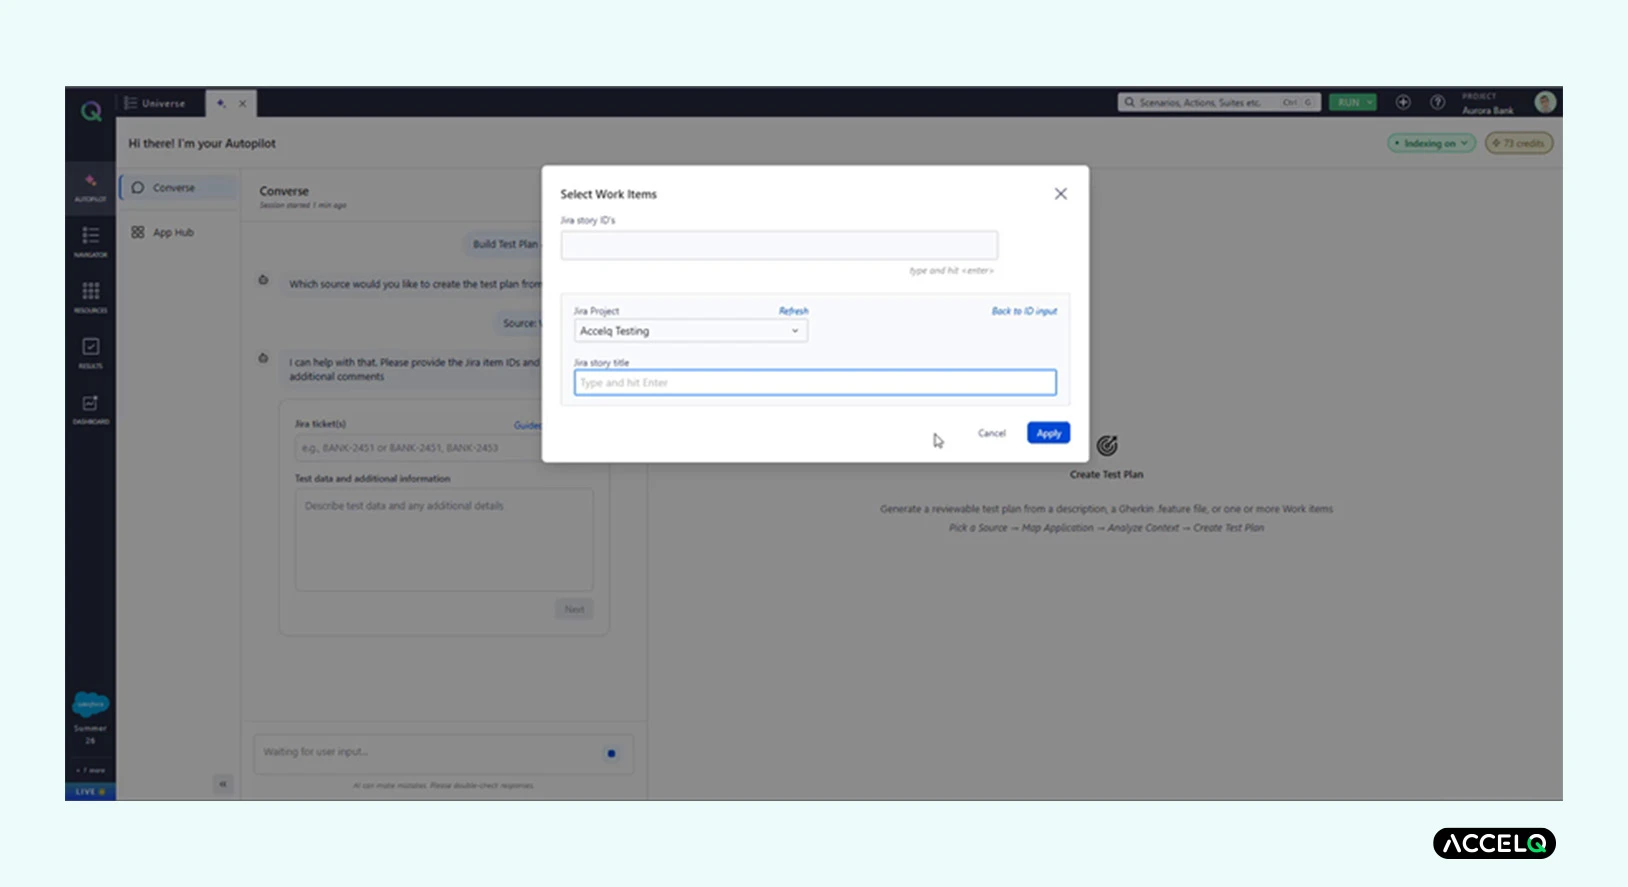
The Select Work Items dialog. Enter a Jira story ID or search by title.
4. Type AT-121 and press Enter. If you only know the title, use Search by Title, then Apply. When you add several items, keep them in one shared context, because Converse interprets them against the same screens.
5. Answer the prompts:
- Data coverage (optional): Name the variations you want. A hint that works well: include invalid email formats, missing required fields, and boundary-length inputs. If you skip it, Converse decides.
- Application (required): Pick the App Hub application. Converse remembers it for later tasks.
- Context: Attach screens and reference files, or capture screens with the App Analyzer (Cmd+P on macOS, Ctrl+P on Windows). Large reference files are summarized, and an orange dot marks them. Without context, the plan is more generic.
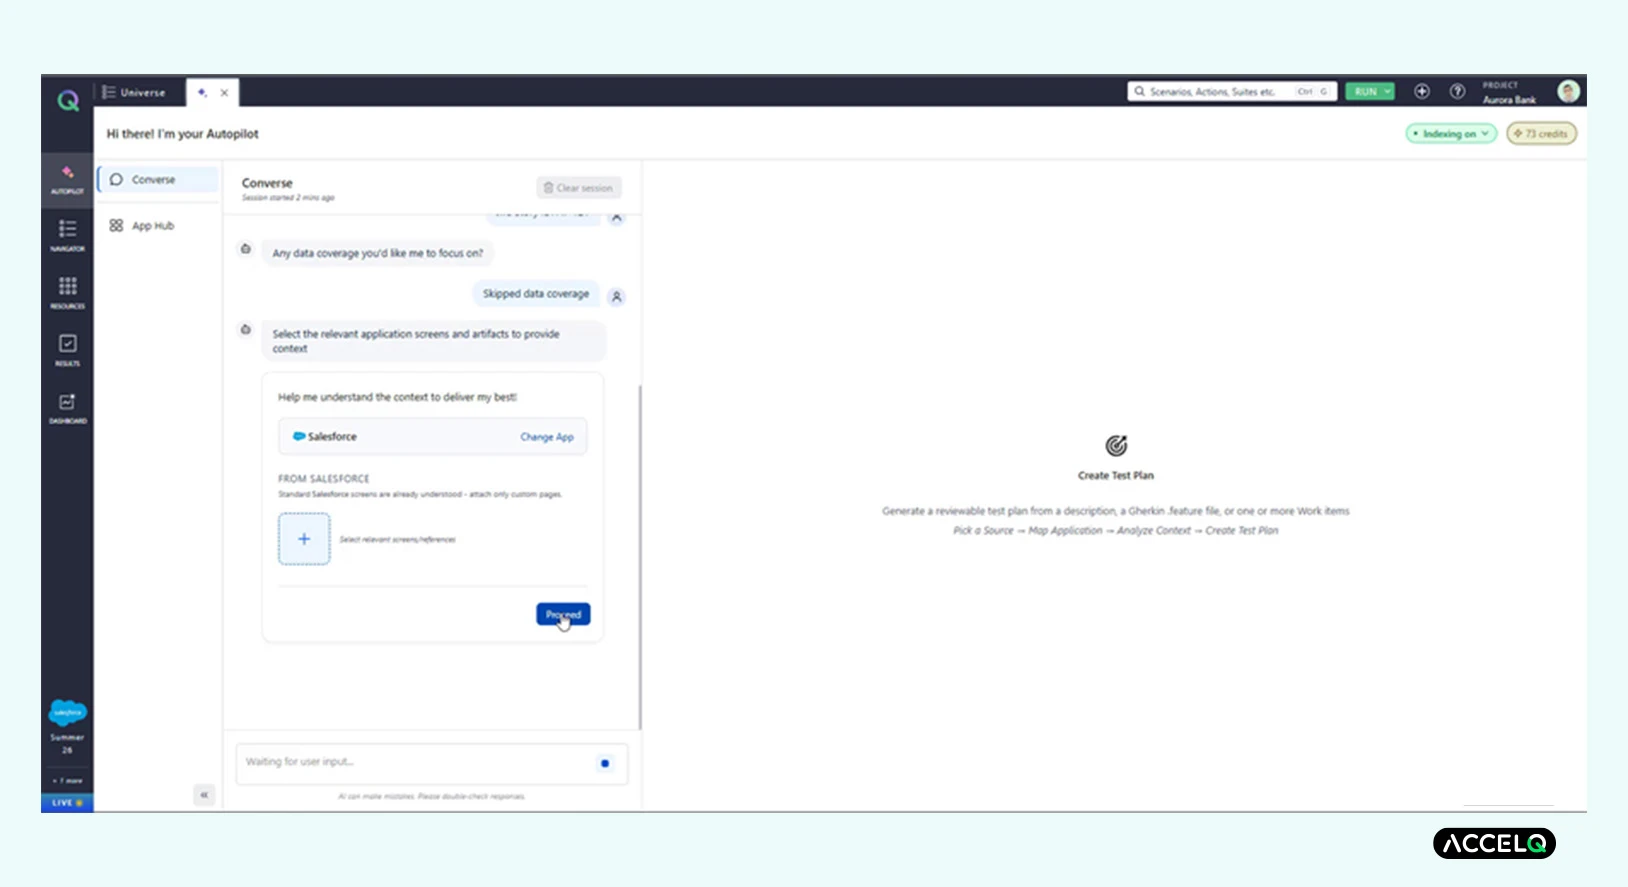
Guided conversation: source selected (Work items), Jira Story ID: AT-121, data coverage prompt.
6. Select Proceed. The Strategy Planner and Test Builder agents return a plan in seconds.
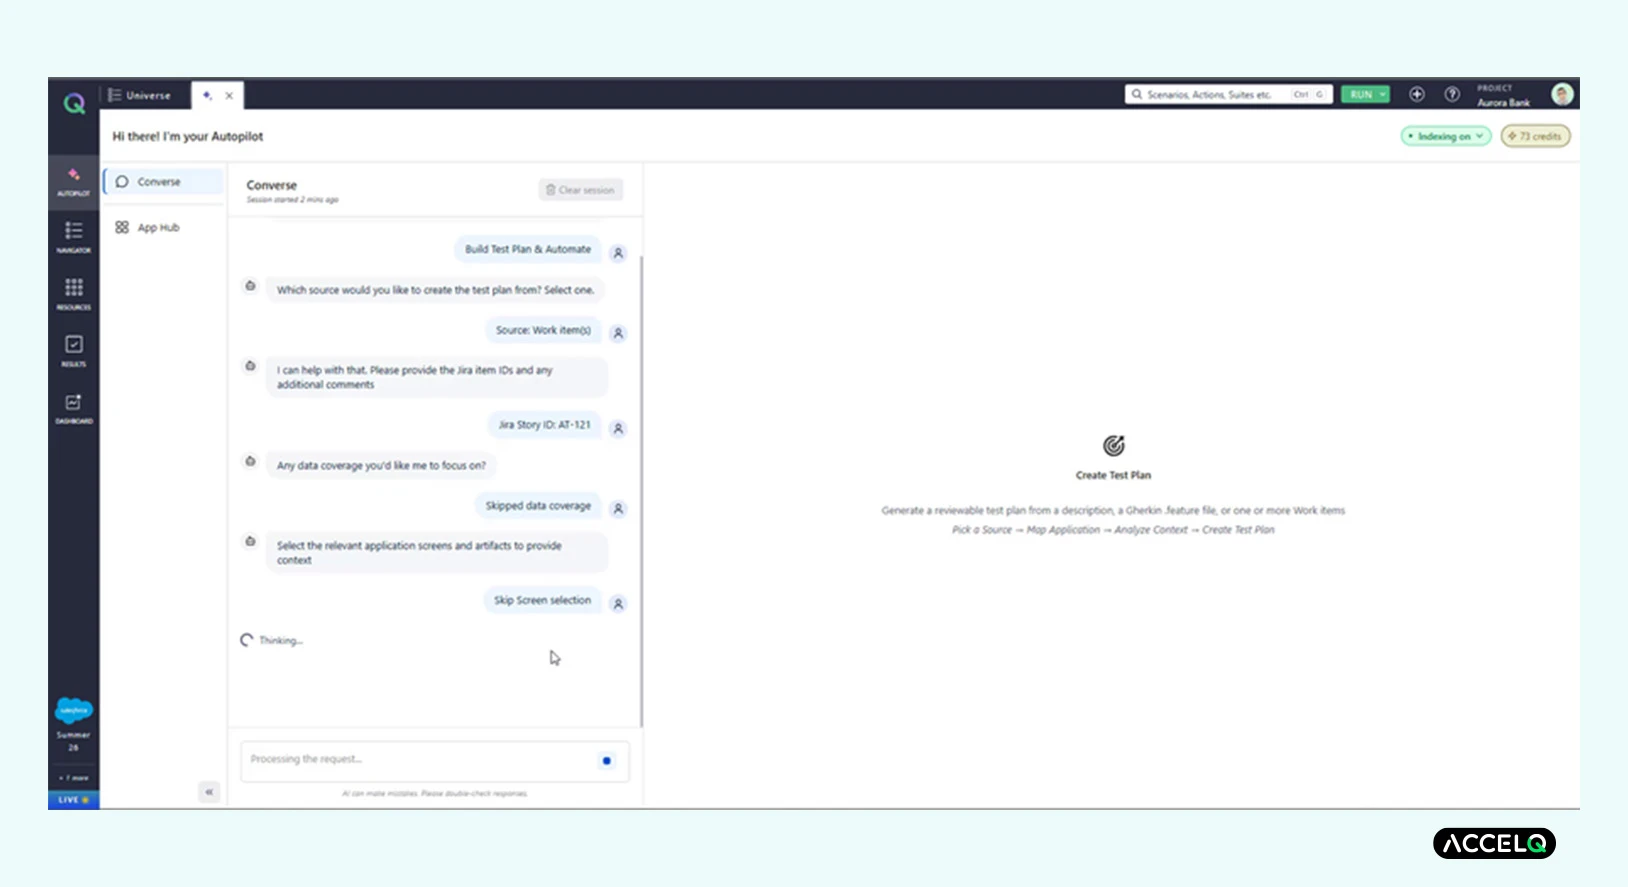
Full guided flow: source → Jira ID → data coverage skipped → screen selection skipped → Processing.
7. Review the plan. For AT-121, Converse produced six data-driven scenarios with 10 test cases (1.7x per scenario). Each scenario carries its variations, so one scenario can cover several invalid inputs, each with its expected result.
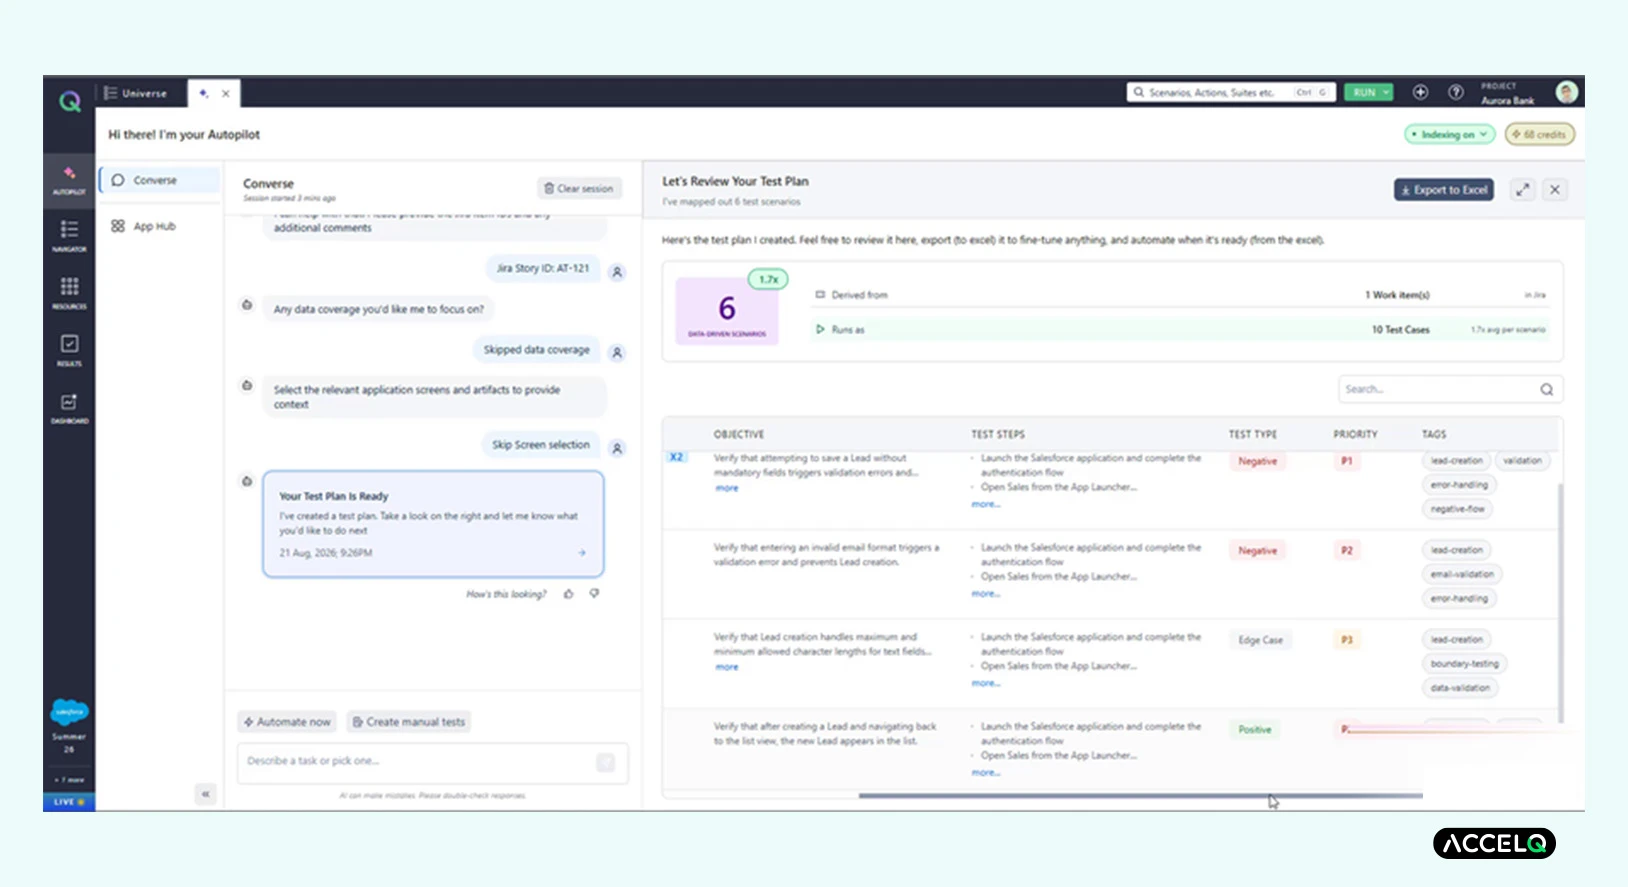
“Let’s Review Your Test Plan” – 6 scenarios, 10 test cases, with objective, test steps, type, priority, and tags.
Open a scenario and check three things:
- Steps: They should follow your Salesforce flow: App Launcher, Sales, New Lead, fill fields.
- Variants: Expect at least one positive case and one negative case, such as a required field missing. If you only see positive cases, add data coverage hints and regenerate.
- Priorities: P1 should be what blocks the story from shipping.
8. Pick the next action:
- Automate now builds each scenario in your Project and reuses matching Actions, such as an existing “Login to Salesforce”. Steps without a match become direct statements in the Scenario.
- Export to Excel gives you an offline copy in the Manual Scenario Import format.
- Create manual tests needs the ACCELQ Manual module.
To adjust a plan, export it to Excel or create manual tests, edit there, then automate. Automation builds the full Scenario logic. Add parameters and Test Cases afterward, using the plan’s variations, the Excel export, or the data you generate in Step 4.
What Converse does for you in this step
- Reasons over your application as well as the story: The App Hub application, screens, and reference files you attach set the body of knowledge behind the plan. Snapshots are always sent in full. Large reference files are summarized to keep credit consumption proportionate, and an orange dot marks them, so upload focused documents, one per subject.
- Builds data-driven scenarios: One scenario carries its data variations. A scenario validating invalid transfer amounts, for example, holds the over-limit, zero, negative, and non-numeric values, each with its expected error message.
- Summarizes coverage before you commit: The plan header shows the scenario count, the intent they were interpreted from, and the Test Case count with an average multiplier. The table lists each scenario’s objective and steps, expands to show its Test Cases and data, and includes a search box.
- Keeps traceability: When you start from work items, everything Converse creates links back to the originating requirement IDs, whether you automate the plan or create it as manual tests.
- Saves your inputs for next time: Anything you upload or capture can be stored on the App Hub application, and you can clear that for items meant for one task only.
- Keeps the plan available: The plan stays open for the rest of the session. Reopen it from the “Your Test Plan Is Ready” card.
You should see the generated Scenarios, Actions, and Contexts in the Navigator.
Step 2: Convert a Manual Test to Automation
- Start from the Manual Scenarios grid (select scenarios, then Automate Scenarios in the toolbar), from Automate ACCELQ Manual Tests in the task panel, or by typing the scenario IDs in chat.
- Confirm the selected scenarios shown in the chat, then select Next. In this example, the scenario is S-107317 and the application is Salesforce.
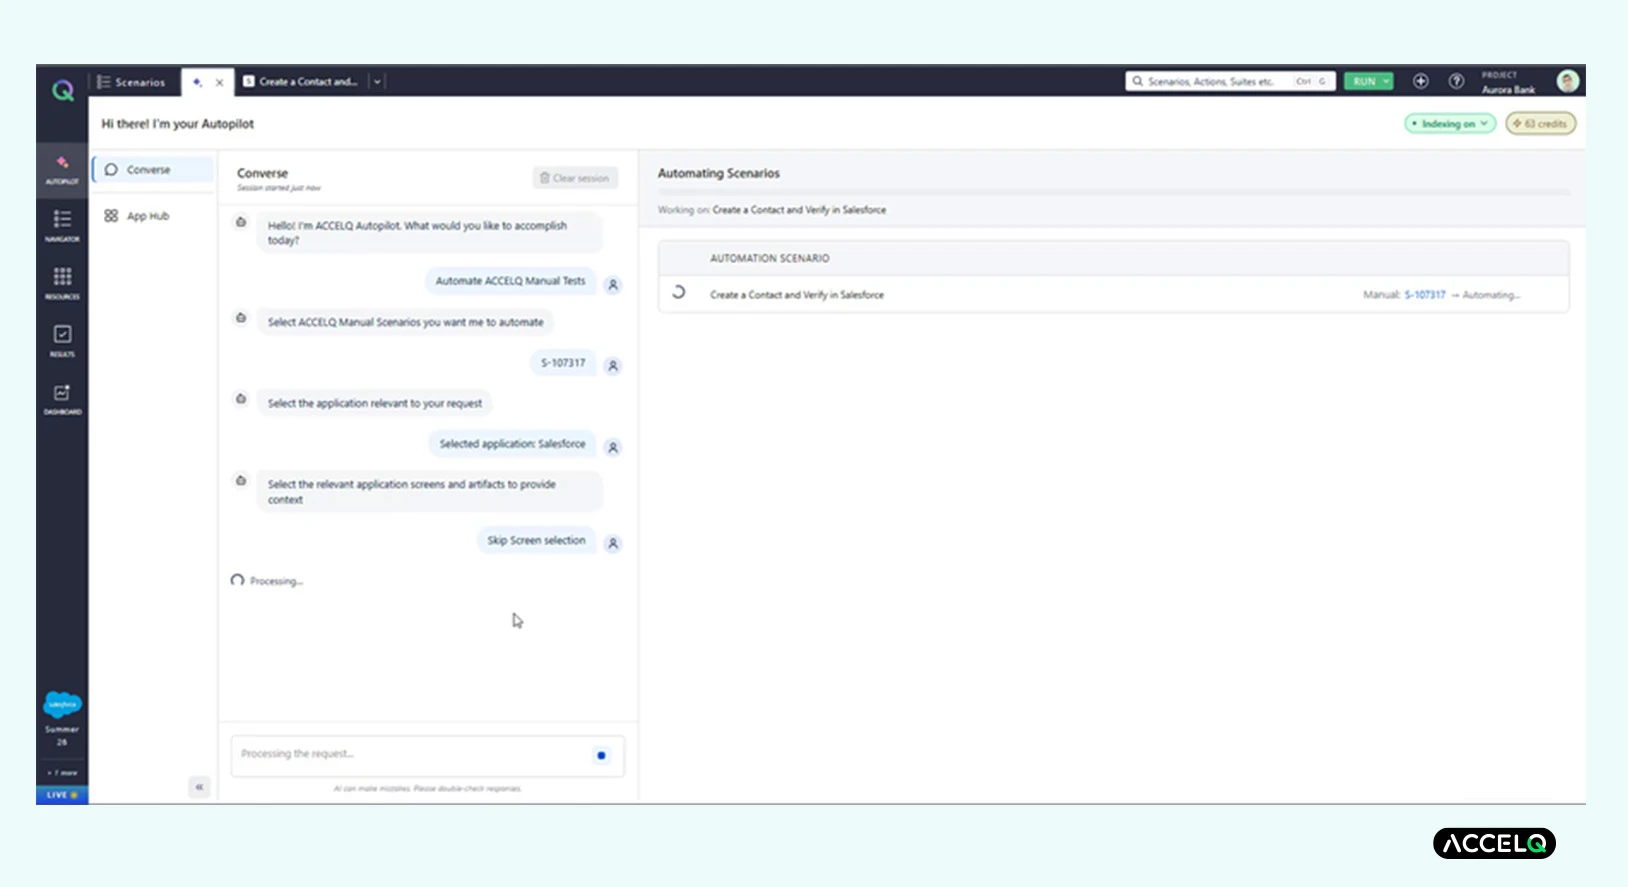
Manual-to-Automation: scenario S-107317, application Salesforce.
3. Attach the screens the manual steps walk through, then let Converse generate the automation.
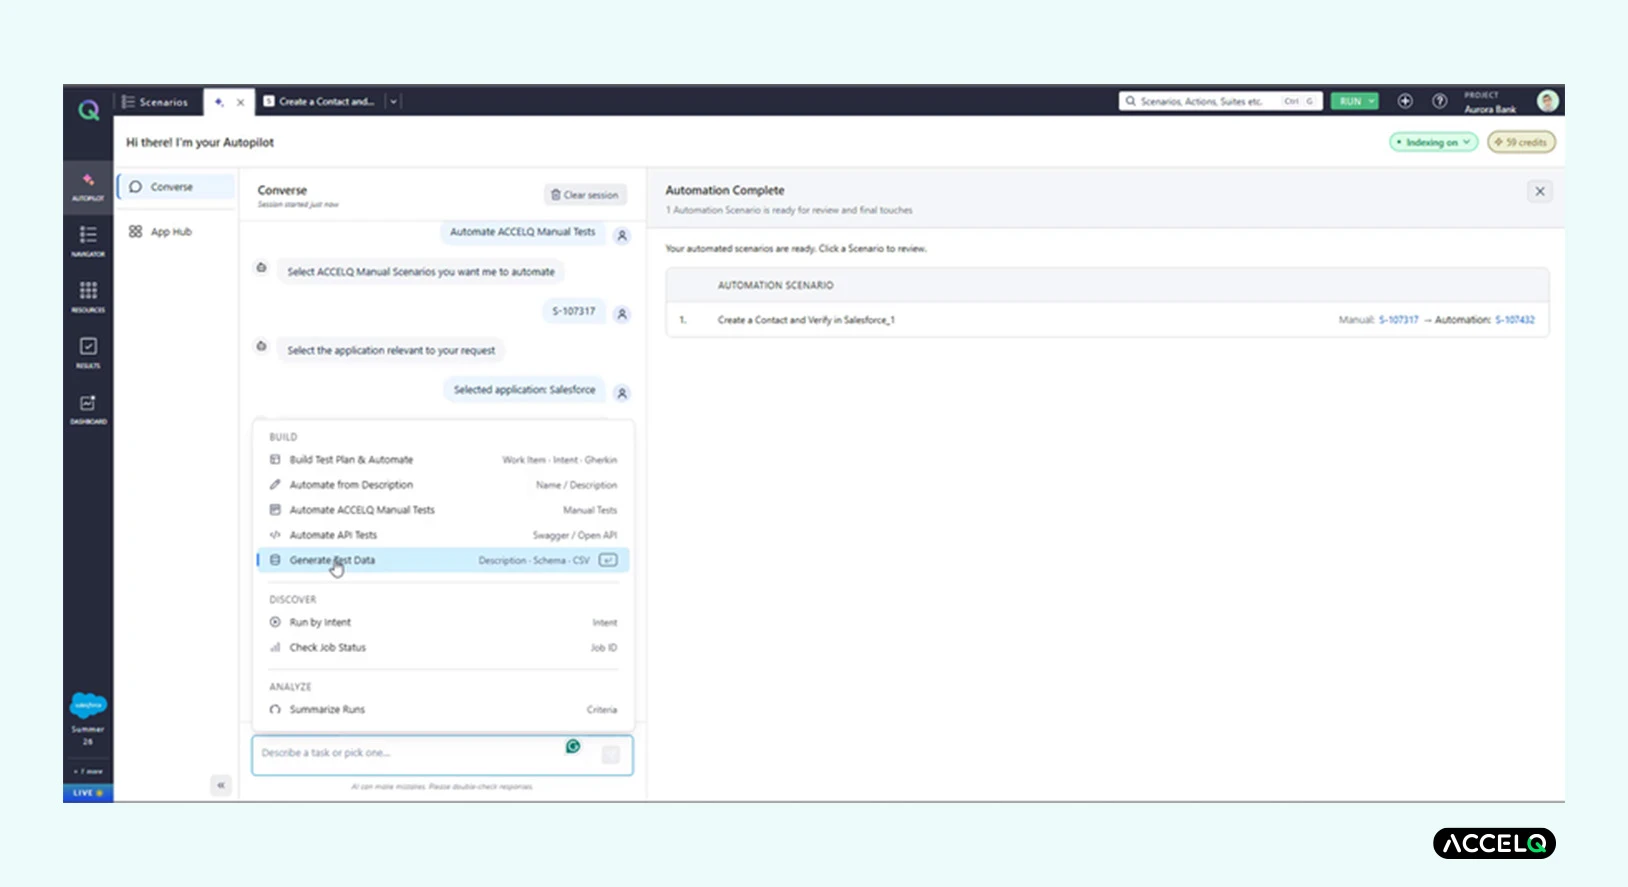
Automation Complete: S-107317 mapped to automation scenario S-107432. Ready for review.
Traceability links both ways: the automation points to its manual source, and the manual scenario points to the automation.
For better results, batch scenarios that walk the same screens, start with your best-documented tests, and review the generated logic against what each test verified. Converse builds the Scenario logic. Add the data variations afterward in the Scenario’s Test Cases tab (Step 4 shows how to generate them).
What Converse does for you in this step
- Works from the manual test itself: A well-documented manual Scenario already holds the steps and expected outcomes, so there is nothing to restate as intent.
- Interprets the batch against one context: Every manual test in the request is read against the same screens and reference files. Build that context once per batch and make it count.
- Reuses what exists: Steps that match Actions already in your Project reuse them, and the matching improves as your Project accumulates reusable Actions. Steps without a match become direct statements in the Scenario.
- Links both directions: Each automation points to its manual source and each manual Scenario points to its automation, so coverage stays connected as your suite moves from manual to automated.
You should see the new scenario in the Navigator, linked to the manual one.
SUGGESTED READ - How do you link Manual and Automated test cases in ACCELQ
Step 3: Automate API Tests from a Swagger Spec
- Select Automate API Tests.
- Provide the spec: paste a URL, or upload a file and select Parse Swagger.
- Select endpoints. Everything starts selected, so clear what you do not need by endpoint or by category.
- Add test data in plain language (up to 1,000 characters). Name the values you expect to pass and fail.
Example: Use pet ID 1 as valid, pet ID 999999 as not found, and an expired authorization token. - Pick the App Hub application. This context lets Converse chain endpoints into business workflows.
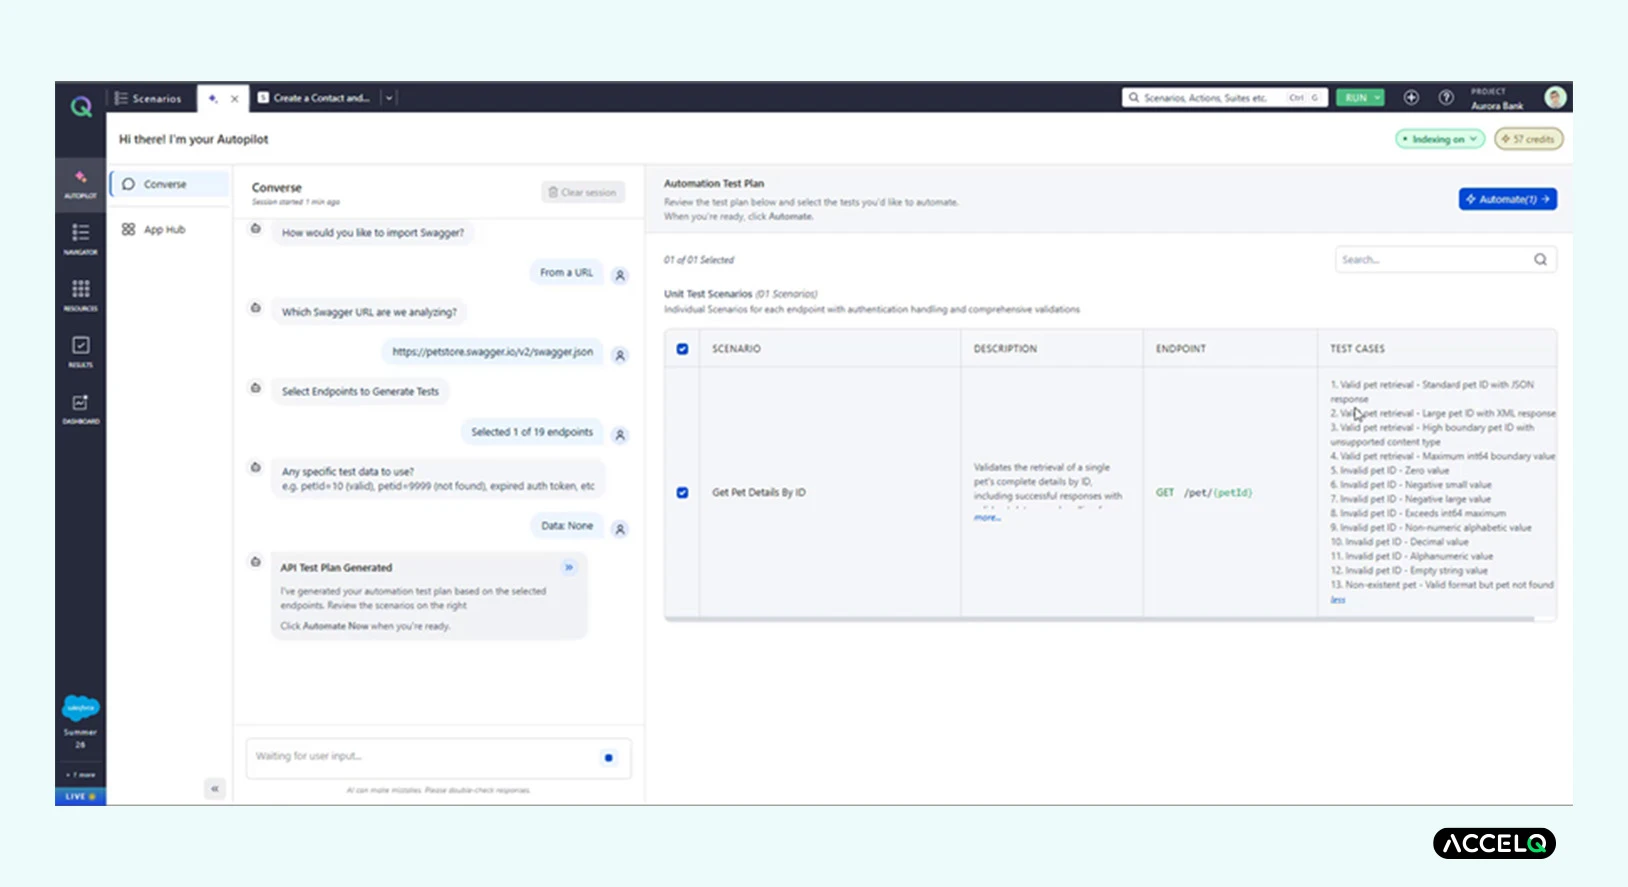
API Test Plan from the Petstore Swagger spec. Get Pet Details By ID (GET /pet/{petId}) selected.
6. Review the plan, select Proceed, and confirm. It has two parts: User Journey Scenarios (multi-endpoint business flows that carry values from one response into the next call) and Unit Test Scenarios (one per endpoint, with authentication resolved and declared responses verified).
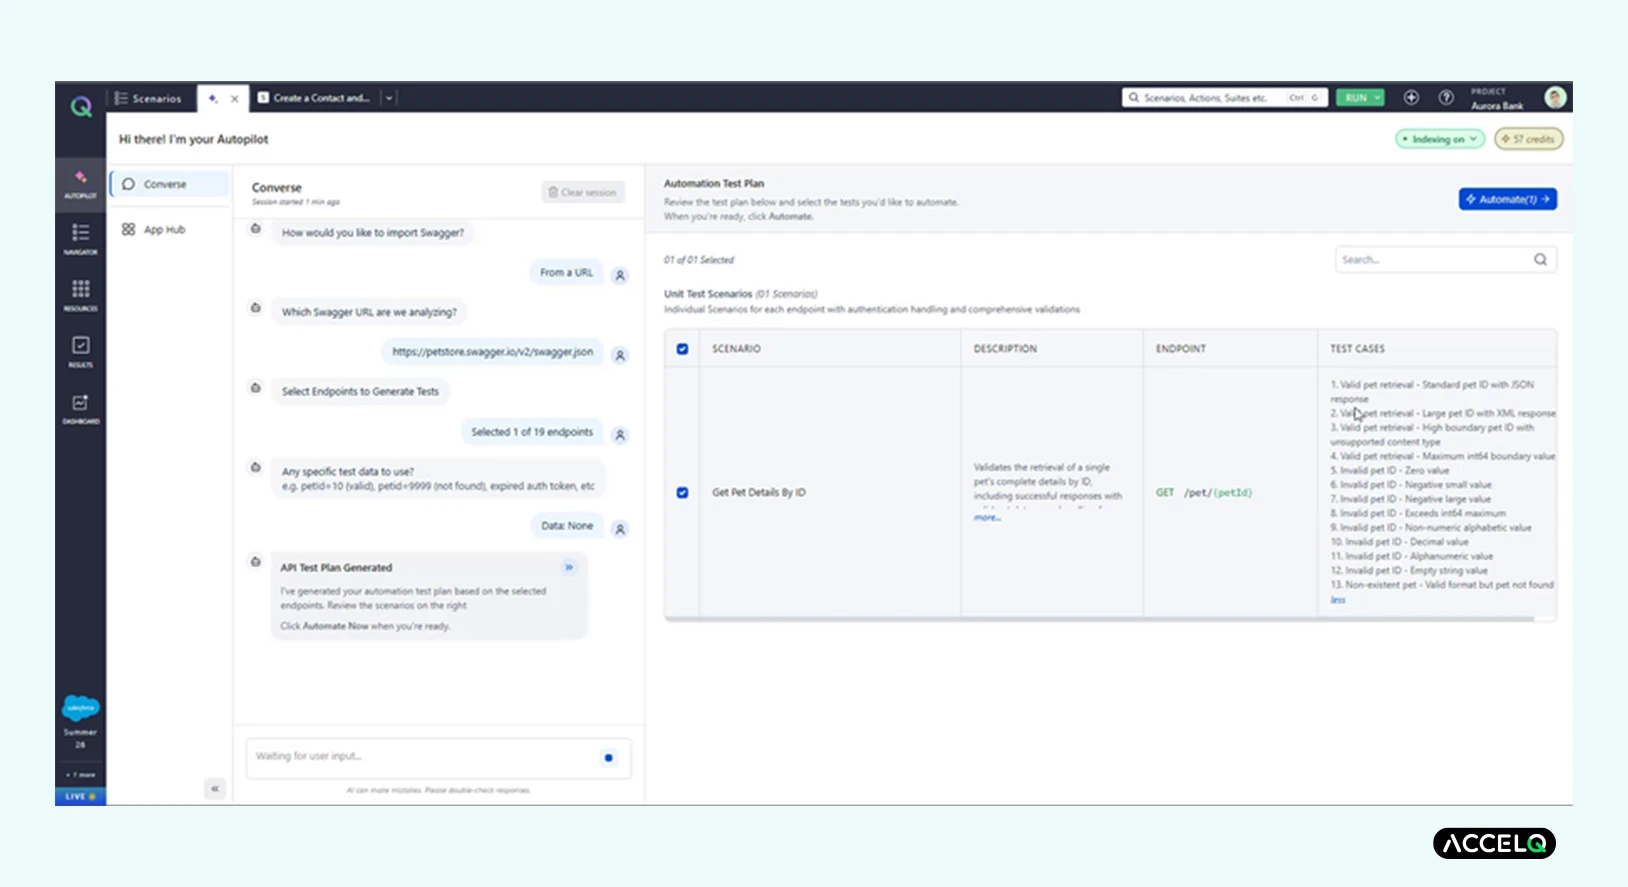
Swagger API Automation Suite: generated scenario S-107433 with test cases.
7. Open each generated Scenario and run Playback against your API. Start with the journeys, since they hold the most assumptions.
What Converse does for you in this step
-
Modularizes: Scenarios are built from reusable Actions, which are added to your Project for future automation against the same API.
-
Parameterizes: Values that need to vary become parameters, linked at the Scenario level so one value flows to every place it belongs.
-
Verifies: Validations cover the responses and status codes your specification declares.
-
Resolves authentication and dependencies: Calls a request depends on are chained ahead of it, so each Scenario stands on its own.
-
Chains output data: Values a later call needs are captured from earlier responses and carried forward.
-
Designs Test Case variations: Data is chosen for maximum coverage from the fewest permutations, with no exhaustive cross-product.
-
Generates global properties: Shared values such as endpoint URLs make the assets self-contained and portable across environments.
Scope the selection to endpoints you intend to maintain. A large specification can produce a great deal of automation in one run, and a coherent group is easier to review.
You should see API scenarios in the Navigator, each with parameterized test cases.
Step 4: Generate Test Data
1. Select Generate Test Data and choose an input:
- Free-form description: Describe fields and constraints in text.
- Field schema: Upload a JSON schema.
- Sample data: Upload a CSV and Converse generates new records with the same patterns. Remove personal data first.
2. For this guide, choose the free-form description and enter:
- All fields are mandatory.
- Salutation: one of Mr., Ms., Mrs., Dr., Prof.
- First Name: max 10 letters.
- Last Name: max 10 letters.
- Phone: starts with 91 followed by 10 digits.
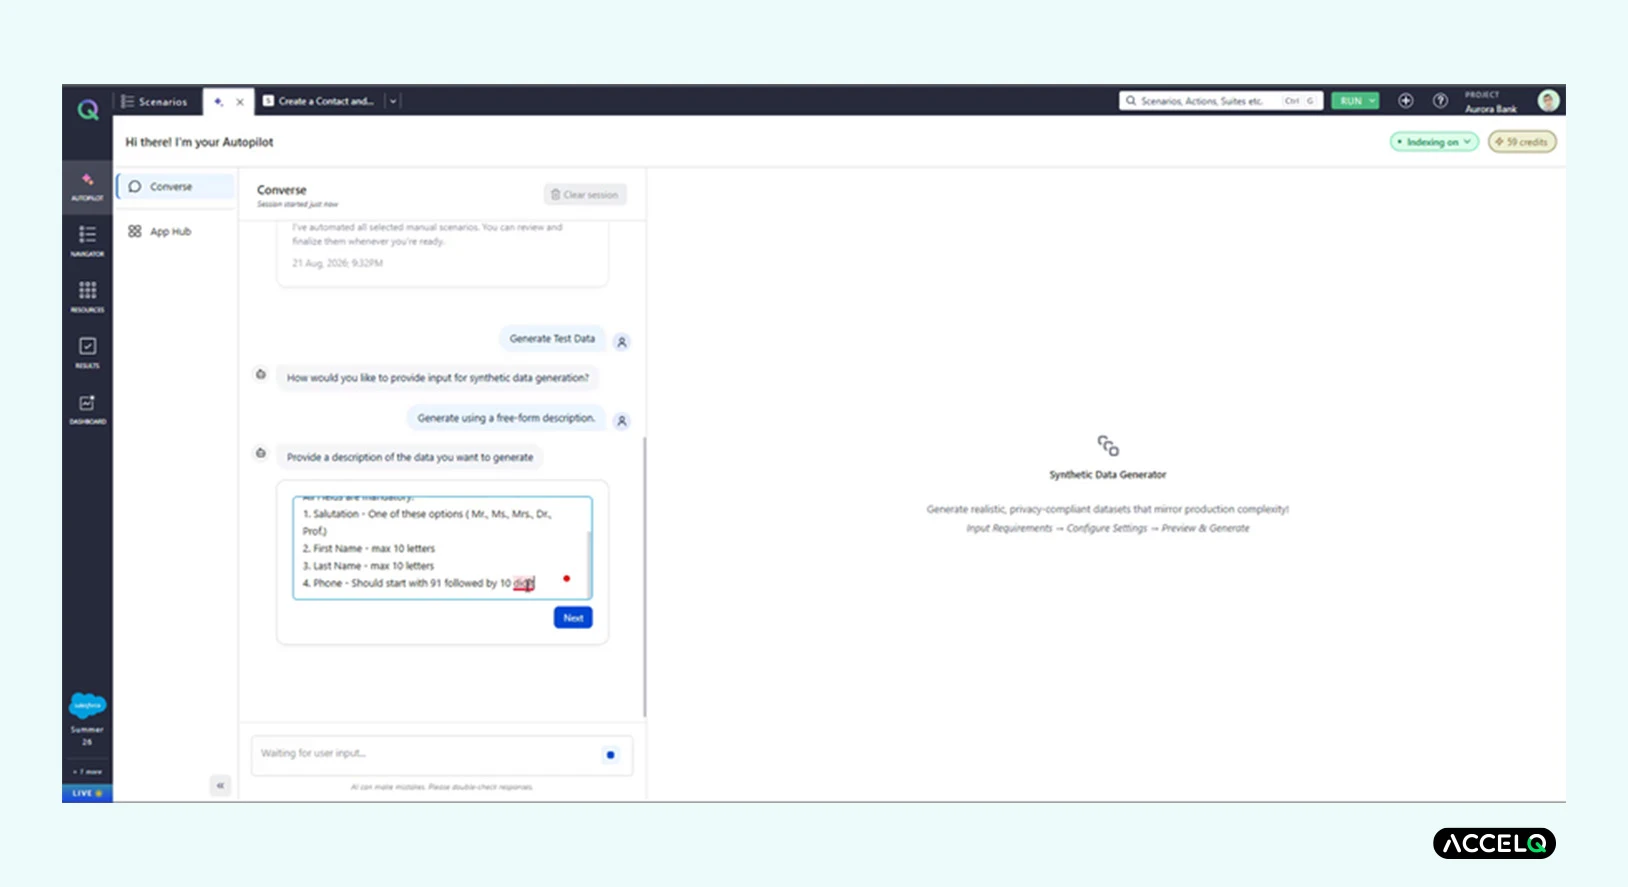
Synthetic Data Generator: plain-text constraints entered.
3. Set the record count.
4. Check the Fields tab and the Patterns & Constraints tab. Use Refine Requirements to edit any rule (one field_name: description per line), then select Generate Data.
5. Preview the records and download as CSV, Excel, JSON, or XML. To use the data, open a parameterized scenario’s Test Cases tab and import it. Each row becomes a Test Case.
Be specific. “Employee ID in the format E-12345” works better than “employee ID with numbers”, and stating that salary depends on department gives more coherent data than describing the two fields separately. The data is synthetic, so there is no production data to mask.
What Converse does for you in this step
- Interprets before it generates: Converse turns your input into a field specification you review. The Fields tab shows each field’s rule with a sample value, and the Patterns & Constraints tab shows distribution behavior and cross-field rules such as correlations, progression rules, or deliberate gaps in identifier sequences to reflect deleted records.
- Reads schemas and samples closely: A JSON schema contributes field types, formats, lengths, nested structures, and enumerated sets. A CSV sample contributes statistical distributions, correlations between fields, time-based trends, and the way gaps appear in real data.
- Generates new records: Output has no derivable relationship to any source record, and uploaded samples are processed in memory only and never stored. With no production data involved, there is nothing to mask or subset, and the dataset is sized to what you asked for.
For the best input, keep a schema simple with complete enumeration sets, and give a sample that covers the diversity and edge cases you care about, including seasonal variation for time-based data.
Step 4 creates a standalone dataset from your constraints. If you already have a designed Scenario, the AI Test Case Generator builds a matrix of test cases from its business logic, with data variations, parameters, and execution paths. It runs today as part of the Scenario Finalize workflow through the Autopilot Architect capability, and a standalone version in the Scenario Test Case tab is planned.
You should see: a dataset matching your constraints, ready to import.
Step 5: Run the Tests
1. Under DISCOVER, select Run by Intent.
2. Describe what to run: a scenario name, a suite, or an intent such as run all Salesforce lead tests.
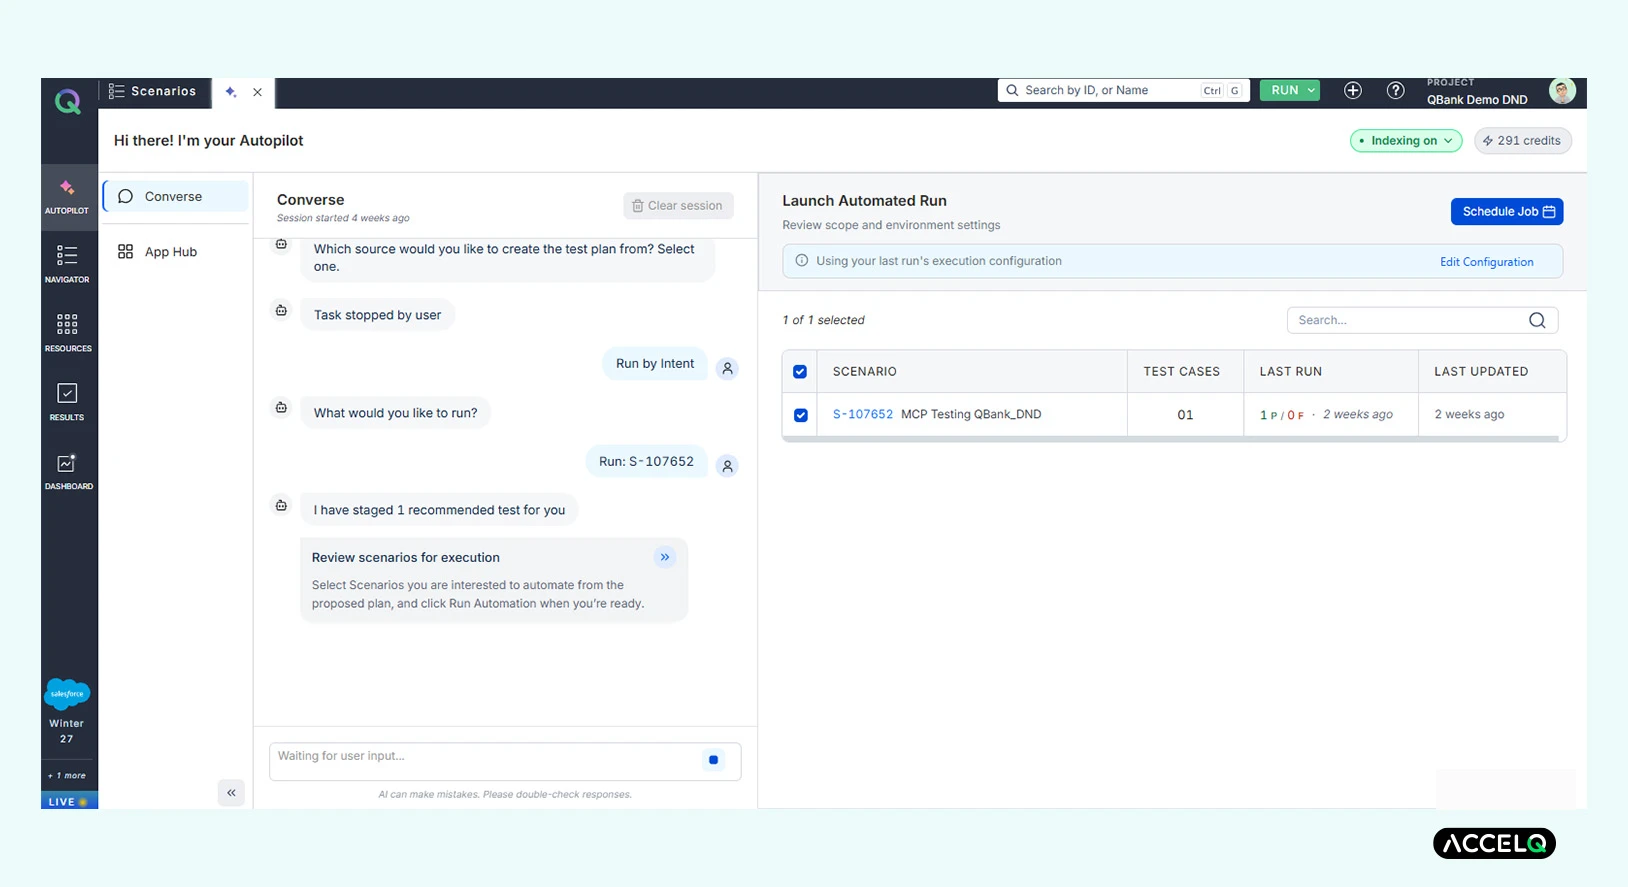
Run by Intent: describe the scenario, suite, or intent to run.
Or run from the Scenarios or Test Suites view: select the scenarios, click Run, then choose the agent, Environment Profile, and browser. The Run dialog works the same for generated and hand-built scenarios (see Steps 7 and 8 of the first-test walkthrough for scheduling and CI jobs).
ACCELQ starts the job and generates a job ID. Copy it, because you will use it in Step 6 to check status.
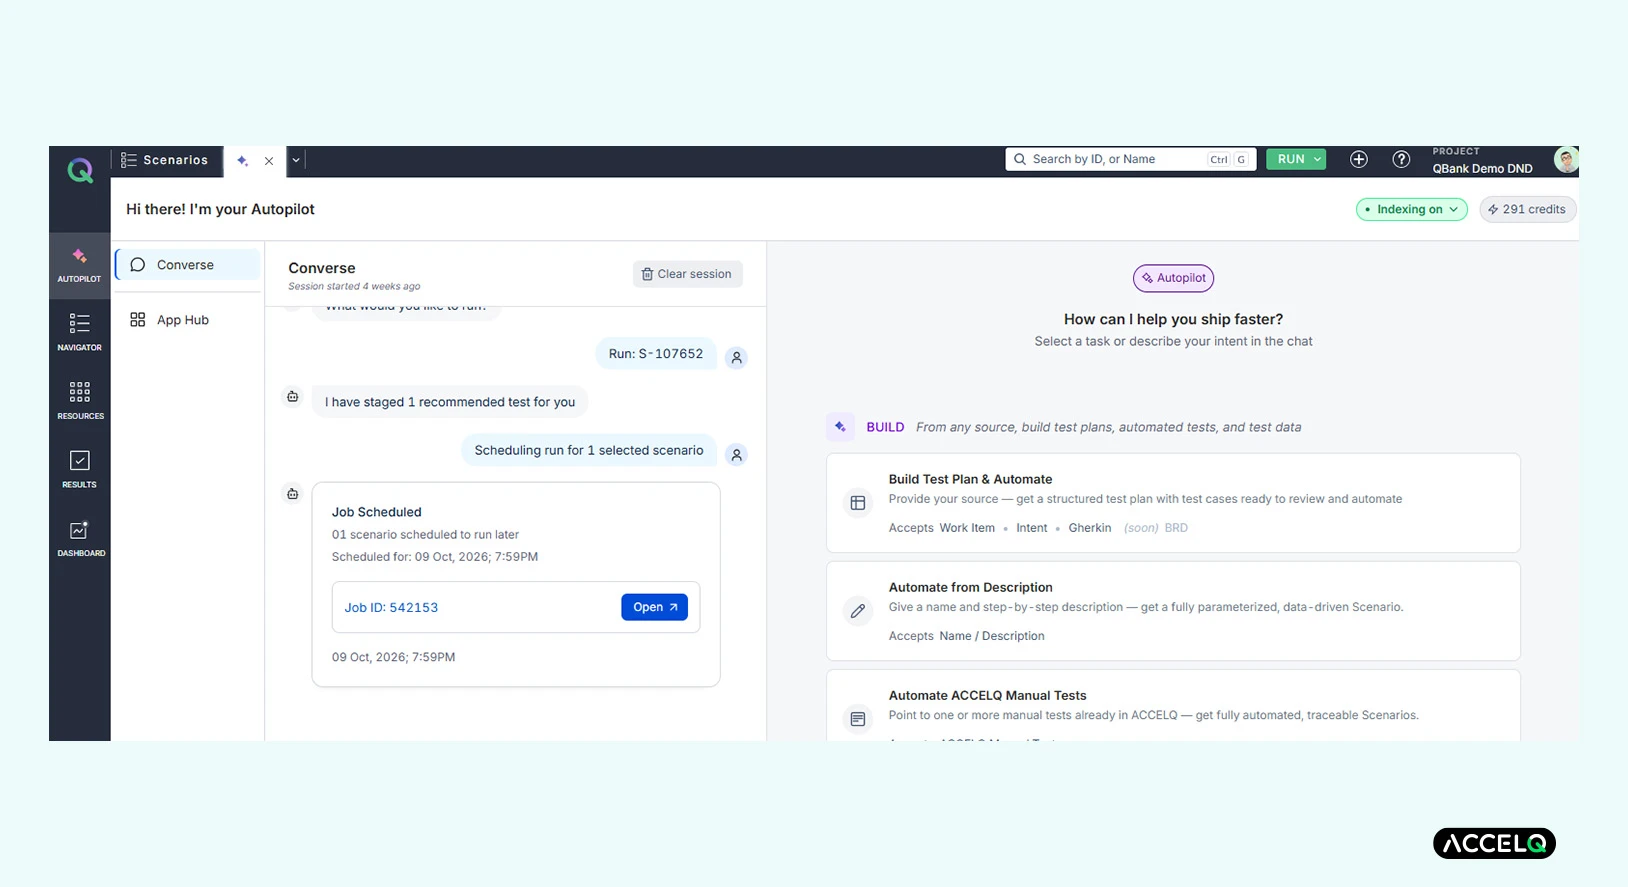
The job ID is generated when the run starts.
You should see the job in the Results sidebar.
Step 6: Check Status and Summarize Runs
1. Under DISCOVER, select Check Job Status and enter the job ID.
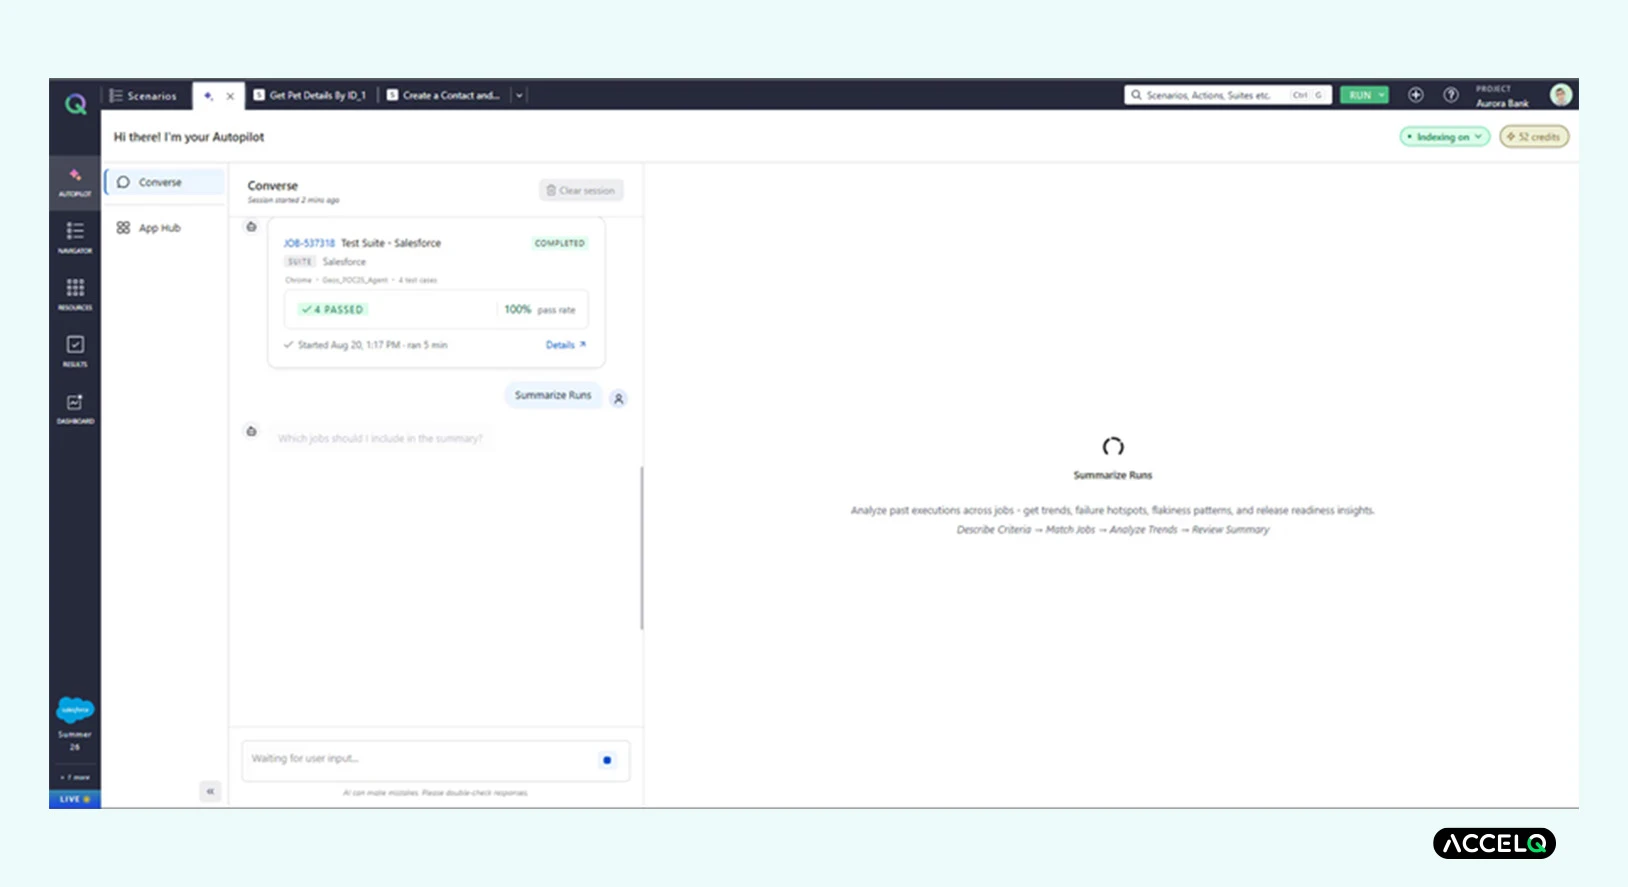
Check Job Status: JOB-537318, Test Suite – Salesforce, COMPLETED. 4 PASSED, 100% pass rate.
2. Under ANALYZE, select Summarize Runs and give it job IDs or a scope in plain English, such as last two weeks on Chrome. You can also start from the Results grid (select jobs, click Summarize) or the Summarize button on a Test Suite page.
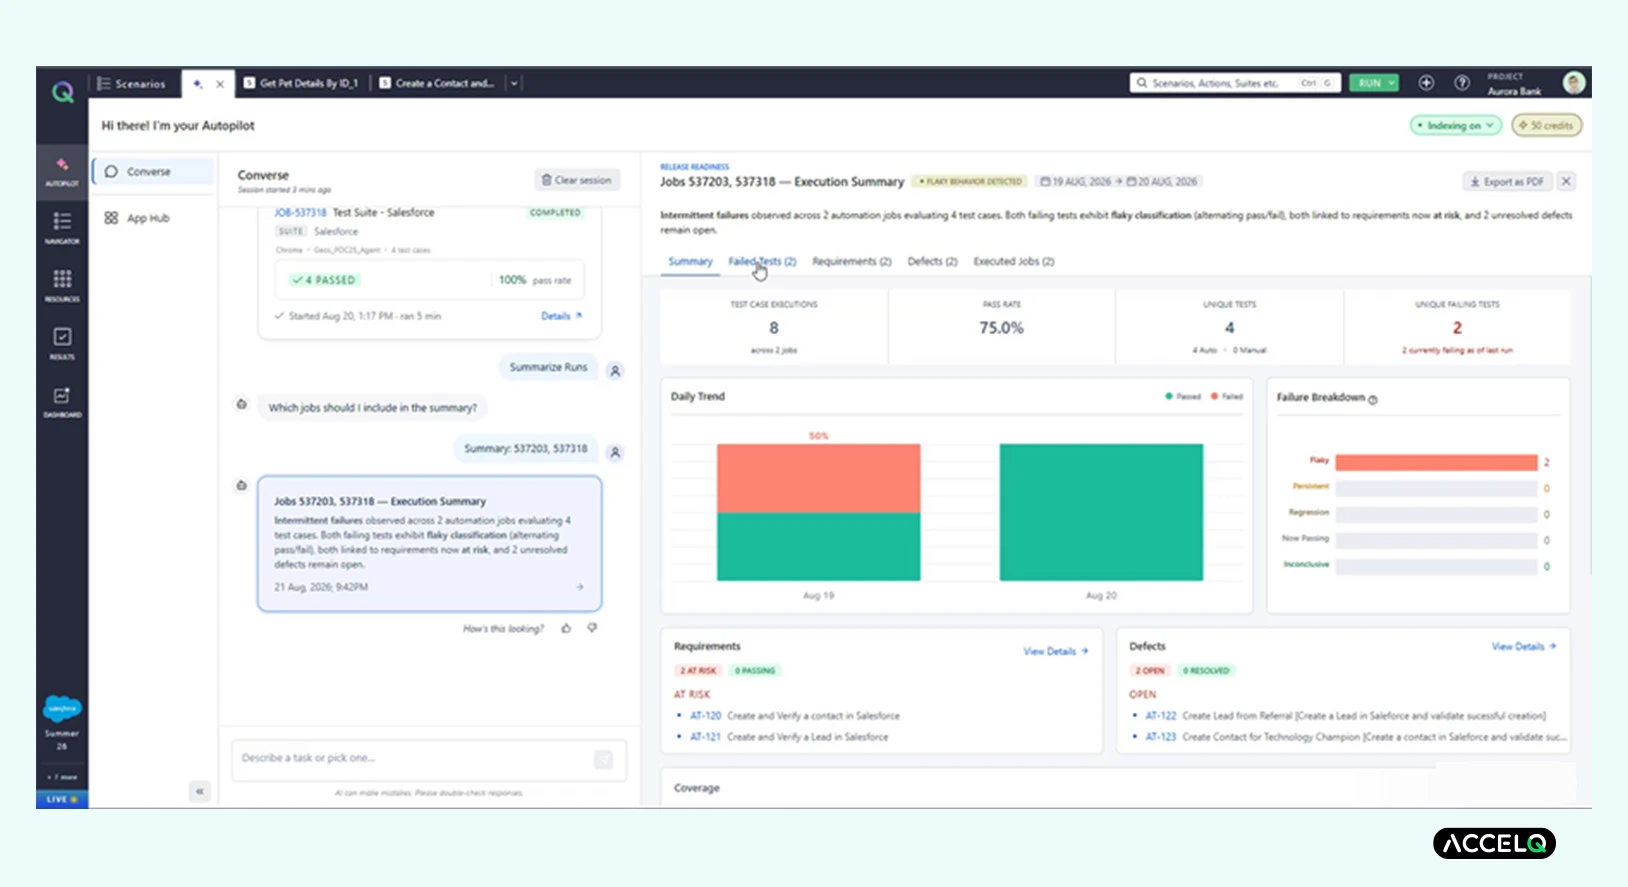
Release Readiness dashboard: Execution Summary across two jobs. Tabs for Summary, Failed Tests, Requirements, Defects, and Executed Jobs.
3. Read the report. In this example, it shows:
- Scope: 8 executions across 2 jobs, 4 unique tests.
- Failure classification: Each failure lands in Persistent, Regression, Flaky, Inconclusive, or Now Passing. Both failures here are Flaky, meaning results alternate between pass and fail.
- Requirements at risk: AT-120 and AT-121. One linked test in a failing state puts a requirement at risk.
- Defects: AT-122 and AT-123, linked to the failing tests. A callout flags failing tests with no linked defect.
- Analysis: An AI-written narrative covering trends and coverage patterns.
4. Download the report as a PDF for release sign-off.
Use the report to decide where to investigate first. It classifies patterns across runs and leaves root-cause analysis to your team.
To get the most from it:
- Summarize several jobs: Failure classification builds on run history. With a single job, failures show as Inconclusive until more runs add context.
- Scope the request: A suite, a release, or a time range keeps the AI narrative specific. Very broad scopes (more than 100 unique failing tests or 50,000 executions) return the full data without the narrative.
- Connect your trackers: The Defects and Requirements tabs appear when those integrations are connected.
- Define execution parameters and custom fields: Release, sprint, and region, plus test case fields such as module and priority, make the coverage breakdown specific to your team.
How the report reads
-
Header: A label such as “Release Readiness”, a descriptive title, a colored verdict badge such as “Largely Stable” or “Regressions Detected”, and a one-to-two-sentence rationale with specific numbers.
-
Metrics row: Executions, pass rate with an early-to-late trend for multi-job reports, unique test cases, and failing tests with how many last failed and last passed.
-
Failure buckets: Persistent fails nearly every run with no sign of recovery. Regression was passing reliably and shifted to consistent failure. Flaky swings between pass and fail with no clear trend. Inconclusive has too few runs to judge. Now Passing was failing and has passed recently, so confirm it with a few more runs. Classification is computed from the time-ordered results, so the same jobs always give the same classification.
-
Coverage analysis: Switch between test case attributes (module, priority, test type, business area) to see which areas struggle, and execution parameters (browser, App Environment, App Variant, device, release, sprint, region, tenant, test cycle) to see under which conditions. Together they show patterns such as one module failing mostly on one browser.
-
Requirements health: A requirement is Passing when all its linked tests pass or are Now Passing, and At Risk when any linked test is Persistent, Regression, Flaky, or Inconclusive.
-
Defects: Tracker statuses are normalized to Open or Resolved, shown beside the raw status, and ambiguous statuses default to Open.
-
Scope and freshness: The report works with automation and manual results, covers up to the most recent 1,000 matching jobs, reflects completed jobs at the moment you generate it, and excludes deleted jobs. Failure rates are execution-based, so one flaky test run many times can lift a module’s rate.
-
PDF export: The download holds the header, metrics, classification chart, AI narrative, coverage tables, failed tests by bucket, defects, requirements health, and executed jobs.
You should see: a Release Readiness report with a verdict, failure classification, and linked Jira items.
Common Issues
- Converse stops or returns no output: Check that your account has enough Autopilot credits. Large reference files, large Swagger specs, and very broad scopes use more credits, so attach focused files and scope each request.
- Too few scenarios or a generic plan: Add data coverage hints, pick the right App Hub application, and attach the screens the story walks through.
- Swagger URL rejected: Confirm it returns a valid OpenAPI 2 or 3 definition and is reachable from your network. If it needs authentication, download the file and upload it.
- Run by Intent finds nothing: Use the exact scenario or suite name, including any rename, or run from the Scenarios view.
Next Steps
The assets Converse generates use the same Context, Action, Scenario structure you would build by hand, so you can edit, extend, and reuse them like any other ACCELQ asset. Start a 14-day free trial (no credit card required), schedule a demo, or talk to a specialist.




You Might Also Like:
 The goal isn’t to fail fast it’s to learn quickly in Test Automation.
 Building a Future-Proof Test Automation Architecture!
 ACCELQ® API Regression Automation