


CI/CD Pipeline with Jenkins: Build, Test & Deploy

In the world of rapid software delivery, manual processes are a drag on teams and a risk vector. Enter CI/CD pipelines — one of the most critical DevOps practices that simplifies code integration for testing and deployment. A central figure in this transformation is Jenkins, an open-source automation server extensively used to build CI/CD pipelines.
What is a CI/CD Pipeline in Jenkins?
Jenkins Pipeline automates all phases of software delivery, right from development to production. CI/CD stands for:
- Continuous Integration (CI): Integrating code changes automatically, running tests, and catching problems early.
- Continuous Delivery (CD): After code is tested, get the code automatically pushed into staging/production — with little to no human intervention.
Hence, using this CI/CD pipeline with Jenkins, development teams can reduce manual errors, provide features faster, and maintain quality control efficiently.
Role of Jenkins in CI/CD
Jenkins plays a pivotal role in enabling CI/CD by:
- Monitoring source control for new code commits
- Triggering automated builds and running tests
- Deploying applications to staging or production environments
- Integrating with a wide range of tools like Git, Maven, Docker, Selenium, and more
Using a Jenkins file, teams can create pipelines as code, which makes automation consistent, shareable, and scalable.
How to Build CI/CD Pipeline with Jenkins?
Let’s walk through a step-by-step guide to set up your CI/CD pipeline with Jenkins.
Step 1: Install Jenkins
You can install Jenkins via:
- Jenkins WAR file (for manual installation)
- Docker (preferred for containerized setups)
- OS-specific installers (Windows/macOS/Linux)
Visit http://localhost:8080 post-installation to unlock Jenkins using the admin password found in the log file or initial setup screen.
Step 2: Install Required Plugins
During setup or from the Plugin Manager, install essential plugins like:
- Git Plugin
- Pipeline
- Docker
- Maven/Gradle
- Slack Notifications (optional)
Step 3: Create a Jenkins Pipeline Job
- Go to Jenkins Dashboard > New Item
- Choose Pipeline
- Add project name, select “Pipeline” as project type
- Under Source Code Management, choose Git and provide the repository URL
Step 4: Define Pipeline Using Jenkinsfile
Use the Jenkinsfile to define stages like build, test, and deploy. Here’s a sample:
pipeline {
	agent any
	environment {
    	MAVEN_HOME = '/usr/share/maven'
	}
	stages {
    	stage('Checkout') {
        	steps {
            	checkout scm
        	}
    	}
    	stage('Build') {
        	steps {
            	sh "${MAVEN_HOME}/bin/mvn clean package"
        	}
    	}
    	stage('Test') {
        	steps {
         	   sh "${MAVEN_HOME}/bin/mvn test"
        	}
        	post {
            	always {
                	junit '**/target/surefire-reports/*.xml'
                	archiveArtifacts artifacts: '**/target/*.jar', fingerprint: true
            	}
        	}
    	}
    	stage('Deploy') {
        	steps {
            	echo 'Deploying to staging/production...'
        	}
    	}
	}
	post {
	    always {
        	echo 'Pipeline execution complete.'
    	}
	}
}
That wraps up your CI/CD pipeline using Jenkins – a step-by-step guide that gives you everything you need to automate and accelerate your software delivery with confidence.
New to Jenkins?
- Dive deeper into its role in modern DevOps workflows.
What is Jenkins in DevOps?
What is CI/CD Pipeline Jenkins?
The Jenkins CI/CD pipeline is a defined set of steps that automate code movement through different stages like build, test, and deploy. It ensures:
- Rapid detection of issues
- Fewer integration problems
- Faster deployment cycles
- Traceable version control of pipeline code via Jenkinsfile
Exploring CI/CD beyond Jenkins?
- Check out our guide on CI/CD solutions with Azure DevOps to expand your DevOps toolkit.
CI/CD with Jenkins: Real-Time Workflow
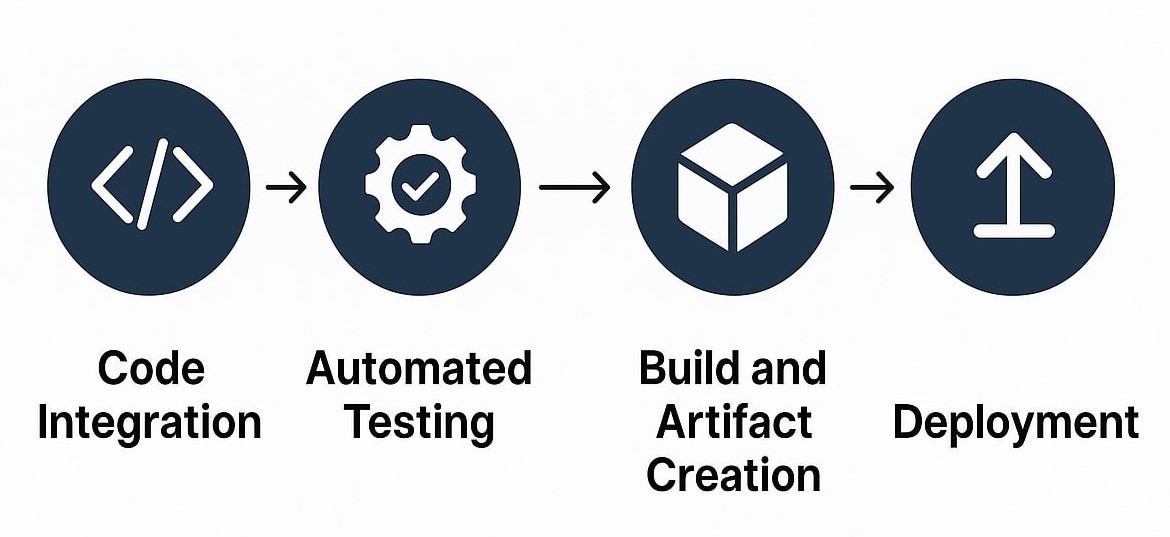
Code Integration
Developers push their code to Git. Jenkins detects changes and triggers the pipeline.
Automated Testing
Tests run automatically to verify changes. Jenkins supports regression, unit, and integration testing frameworks.
Build and Artifact Creation
Code is compiled, and a build artifact (e.g., a JAR/WAR file) is generated using tools like Maven or Gradle.
Deployment
Artifacts are pushed to a staging or production server, Docker container, or cloud platform like AWS/GCP.
Continuous Integration Testing with Jenkins
With Jenkins, you can automate testing across every stage of development:
- Use tools like JUnit, TestNG, Selenium, and Appium
- Run tests on every commit to catch bugs early
- Generate reports and visualize trends over time
CI testing not only boosts quality but ensures that issues are flagged and fixed before reaching production.
Final Thoughts
A well-structured Jenkins CI/CD pipeline is not just an automation tool—it’s a productivity booster and a quality assurance mechanism. A well-structured Jenkins CI/CD pipeline is not just an automation tool—it’s a productivity booster and a quality assurance mechanism. By integrating support for version control, build, test, and deployment tools, Jenkins makes it easier for development teams to innovate so that they will not be caught up in integration errors. Jenkins is flexible and powerful enough to keep pace with your needs, no matter where you are on your journey of CI/CD or scaling your DevOps practice.
Looking to accelerate your CI/CD initiatives?
Talk to us at ACCELQ. Our AI-powered codeless test automation platform seamlessly integrates with Jenkins to supercharge your software delivery lifecycle.


Prashanth Punnam
Sr. Technical Content Writer
With over 8 years of experience transforming complex technical concepts into engaging and accessible content. Skilled in creating high-impact articles, user manuals, whitepapers, and case studies, he builds brand authority and captivates diverse audiences while ensuring technical accuracy and clarity.

You Might Also Like:
 How To Automate Usability Testing in a CI/CD Process?
How To Automate Usability Testing in a CI/CD Process?
 Top 10 Continuous Integration Tools In 2025
Top 10 Continuous Integration Tools In 2025
 What is Jenkins in DevOps