


According to research, around two third of the world's population uses mobile devices, and due to this huge number of mobile users, the number of apps released to the market has also been exponentially increased. As the number of apps increased due to high demand, it is becoming quite important for the company to ensure that the apps going to the app store are high quality. For which teams need to incorporate Mobile testing.
Mobile testing is the process by which apps for mobile devices are tested for functionality along with usability. But, mobile testing is quite tedious as compared to web testing as we need to test across wide varieties of mobile devices that support different Mobile operating systems like Android and iOS.
There are basically two main ways of solving the support for multiple devices. One is using Real-devices, and another option is more convenient and economical, using virtual devices. Those virtual devices are basically called emulators. In simple words, emulators basically imitate real devices which can be used for app testing. In recent days many companies have started using virtual testing devices or Emulators for its cost-effectiveness and ease of use.
In this, we will discuss more about the emulators along with its setup and usage.
What is Emulator
As discussed in the introduction, Emulator is a tool that creates virtual Android devices (with both software and hardware), emulators are very important to perform Mobile Testing, below are the steps to create an Android Mobile device which we can use for Mobile Testing on any Android Version.
It basically mimics the software and hardware of the target device. It usually works by translating the ISA (Instruction Set Architecture) of the target device to the one used by the computer used to conduct testing using binary translation.
In my last ten years of experience, I have observed that we always prefer to do the dry run on emulators when we want to test mobile applications. In fact, most of the companies prefer to use emulators for their regression suite execution. So it is quite important to learn about emulators and how to create them for Appium testing.
Prerequisite for Emulator Setup
For the best user experience, it is advised to use the emulator in Android Studio on a computer with the following specs:
- 16GB RAM
- 64-bit Windows, macOS, or Linux operating system
- 16GB disk space
Remember that if the above spaces are not present, the emulator might still run, but it probably won’t be as smooth as expected. That's why it is advisable to have the above-mentioned system requirements.
Download Android Studio
First, make sure that you have Android Studio downloaded on your machine, and to download the same, please refer the below link:
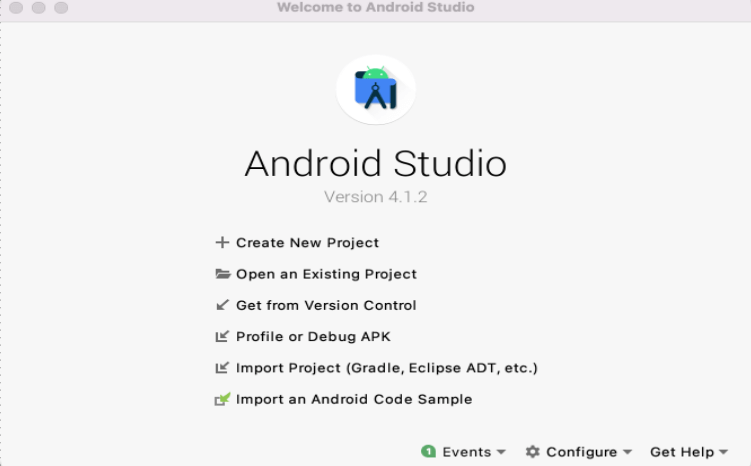
Once Android Studio is downloaded, we need to install the same. Below are the steps to install Android studio, along with the steps to use Emulator.
Step-01
The first step would be installation of Android Studio. To install it on Windows, follow the below steps:
- 1. If the downloaded file is an .exe file which is recommended, then simply double-click on the same to launch it.
But if the downloaded file is a .zip, then first we need to unpack the ZIP, after that copy the android-studio folder into the Program Files folder, and at last open the android-studio > bin folder and launch the studio64.exe (if you are using 64-bit machines) or studio.exe ( 32-bit machines). - 2. Now next, we need to follow the setup wizard in the Android Studio and install any SDK packages that it recommends.
To install Android Studio on your Mac, proceed the step below:
- 1. First we need to launch the Android Studio DMG file.
- 2. Then like any other Mac installation we need to drag and drop Android Studio into the Applications folder and then launch the Android Studio.
- 3. Select whether we want to import previous Android Studio settings, then click the OK button.
- 4. The Android Studio Setup Wizard guides you through the rest of the setup, which includes downloading Android SDK components that are required for development.
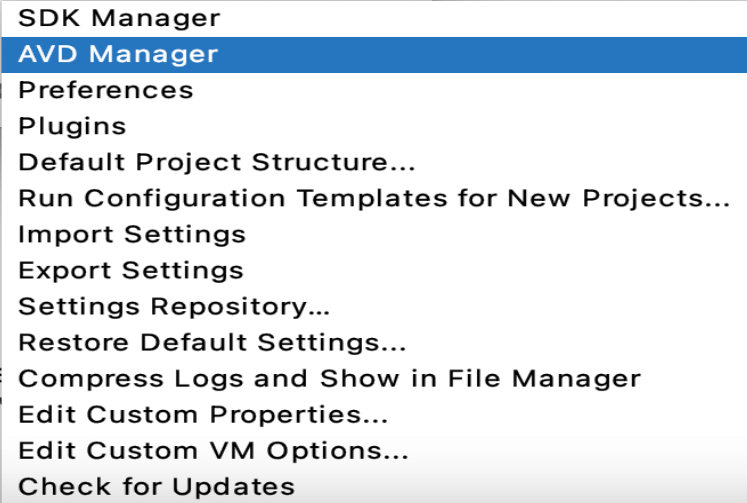
Step -02:
Open Android Studio and click "Configure" option, from the dropdown options, select the "ADB Manager" from the list as shown below:
Step - 03:
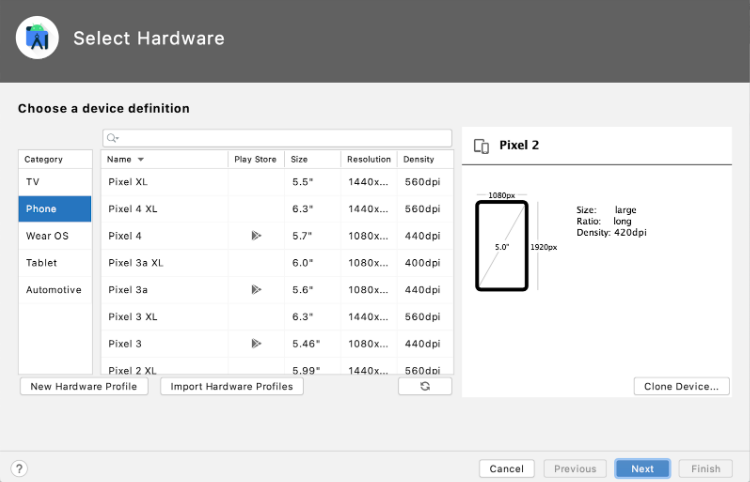
Now you should be able to see a button with text as "Create Virtual Device", Click on the button, and it will redirect to the "Select Hardware" page. On this page, we need to select the mobile type, for example, "Pixel 4" or Pixel XL as shown below, and then click on the "Next" button at the bottom right of the screen.
Step - 04:
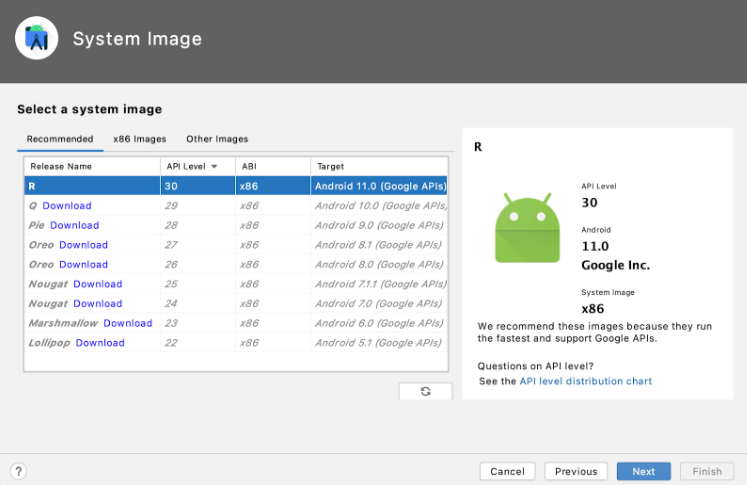
Once we move next from the "Select Hardware" page, the next page is on "System Image". On this page, we need to pick the Android version we want in our mobile device for testing purposes, for example, Oreo, Pie, R, etc.
In the below image you can see that I have selected Android 11, then click on Next:
Step - 05:
The next page would be "Verify Configuration" page, here we can verify the options we have selected in step 3 and step 4, do provide the name of the device as you can see that we have given the name "Pixel 2 XL API 30" as name in the screenshot below:

There is also an option where we can change the Memory and Storage by clicking on "Show Advanced Settings", you will get the options as shown below, now click "Finish"
Step - 06:
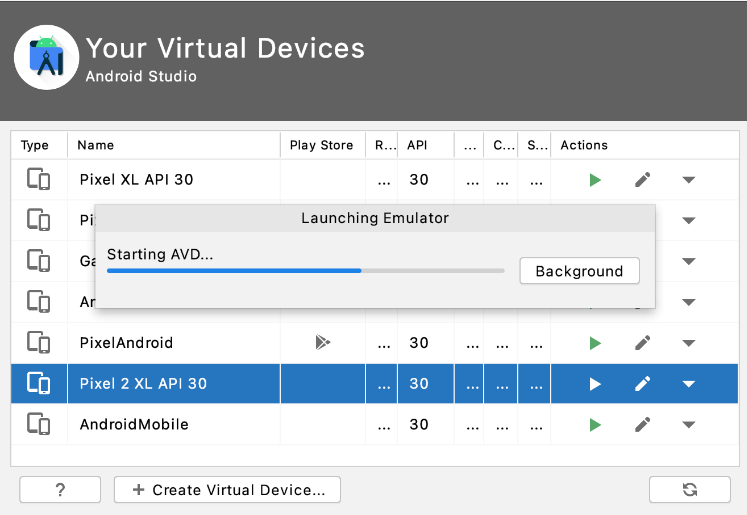
Now the device creation is completed, and in the dashboard, we should be able to see it, search with the device name that we have provided in Step-05, as shown below, now just click on the Play button, and the device is up & ready for testing 🙂
Once the button “Launch” is clicked you will able to see “Launching Emulator”
Now we can perform the testing by simply dragging the .apk to the newly created virtual device.
INSTALL APK
There are many websites that provide the sample apk or ipa, which can be used for testing. If you do not have any .apk or .ipa files, you can use the practice apk HERE.
Run & Stop an emulator
From the Virtual tab on the screen, we can perform multiple operations on an emulator as mentioned below:
- If you want to run an emulator that uses an AVD, you need to click Launch
- Similarly, when we want to stop a running emulator, click Menu and select Stop.
- And to clear the data for an emulator, select Wipe Data options. Or click on Menu and select Wipe Data options..
Benefits Of Emulator
Cost: One of the benefits of using emulators is Cost-efficiency, as teams can perform mobile testing at a lower cost with emulators since some of them can be downloaded for free on the Internet.
Cross-platform support: Emulators can imitate a wide range of devices and operating systems, enabling teams to easily perform tests on different platforms or required devices. The emulator usually has predefined configurations for various Android phones, tablets, and also Android TV devices.
High fidelity: The emulator successfully provides all of the capabilities that you can get from a real Android device. In fact, you can also simulate incoming phone calls and text messages, specify the location of the device, simulate rotation, simulate different network speeds and other hardware sensors, access the Play Store, and much more.
- Faster and intuitive automated tests that are automatically triggered from process workflows
- Cross-browser testing for both on-premises and cloud environments
- Faster turnarounds enabled by parallel test executions
- Dynamic live reports of automated testing results, along with actionable report generation
Do you need professional expertise to test your Oracle Cloud applications? We can provide you with technical expertise. Simply sign-up today for a free product demo!

Be part of the lively group discussions covering various topics around Web, API, Mobile Test automation, and more...

Conclusion:
Due to the cost efficiency and ease of use, it is quite convenient to use Emulators, but there are some risks to consider, which might have an impact. That’s why it’s a good idea to use both – emulators only in the initial testing phases to uncover basic bugs and afterward switch to the actual devices to ensure great quality of the test product.
If your team is having a bandwidth crunch or unable to pace up with Automation, then ACCELQ can be considered as one of the most powerful AI-Powered Codeless Test Automation on the Cloud for mobile test automation. Achieve 3x productivity & over 70% savings. Refer to the video link here for the steps how to perform Mobile Test Automation with ACCELQ.

![]()
![]()
Sidharth Shukla
SDET at Amazon
Siddharth is the founder and author of Automation Reinvented and has conducted training sessions on UI/API automation with CICD integration. He also works closely with companies to help them develop new automation tool
Related Posts
 Mobile Testing with Emulator
Mobile Testing with Emulator
 Challenges in Automating Flutter Apps Using the Traditional Framework